This guide will demonstrate the steps taken to create the Delphi example for the Instant Protection PLUS 3 DLL.
Embarcadero Rad Studio XE2 was used when creating this guide, but this guide should still apply with slight changes for other versions of Delphi.
If you are using this guide to implement the Instant Protection PLUS 3 DLL with your own application, you can skip to Step 2 below.
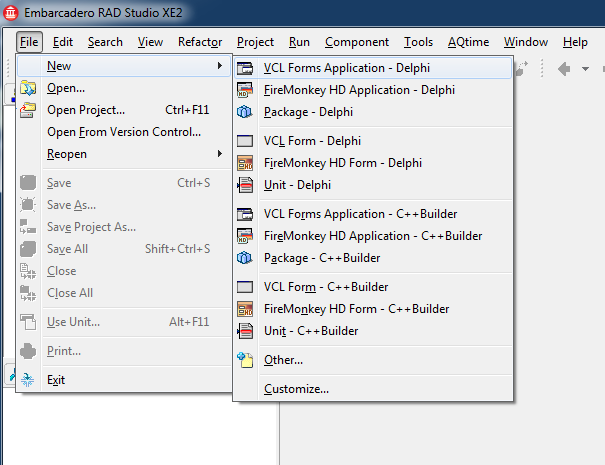
Open Rad Studio XE2, click File, then New, and then VCL Forms Application - Delphi. An application with a single Form will be created.
Save the project.
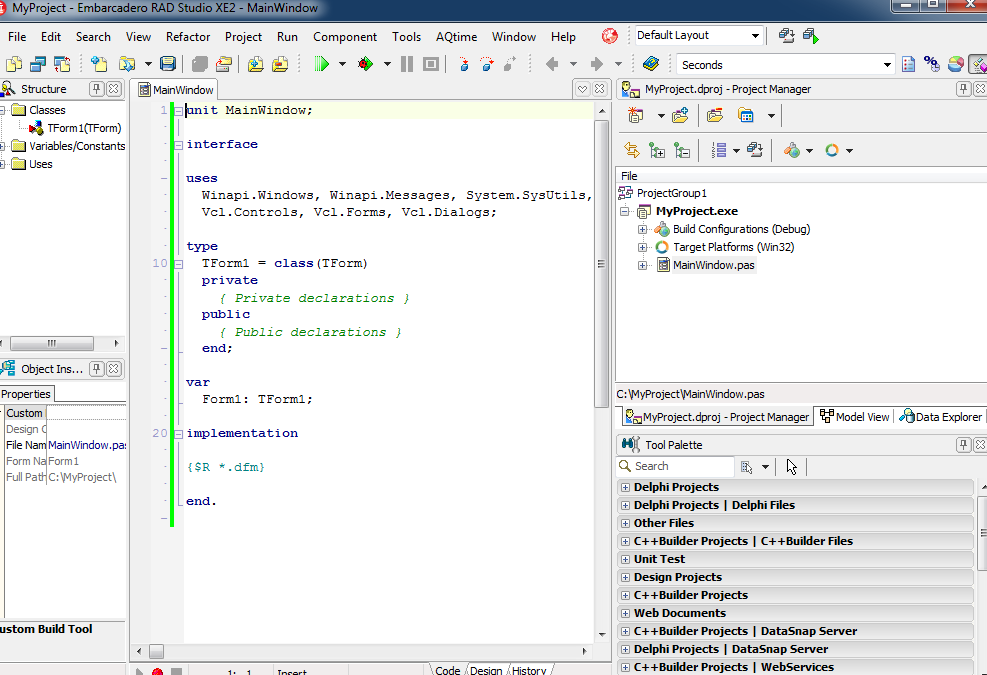
In this guide I will save the project to a folder called MyProject on the C drive. Select File\Save Project As from the menu. In the Save As file browser window, navigate to C:\MyProject then change the name of the code file from the default of Unit1.pas to MainWindow.pas and click Save.
Change the project name to MyProject and click Save. Your Project Manager window should look similar to the one below.
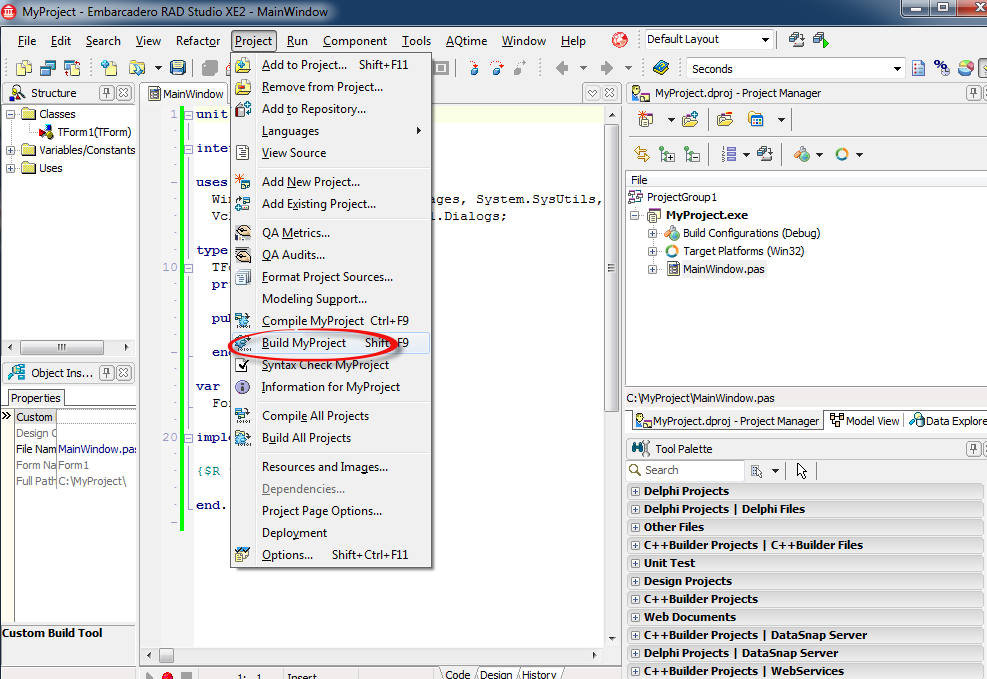
From the menu select Project/Build MyProject. Make sure there are no errors. This will create a folder under your project folder named for the current build configuration. By default we are building a 32-bit win32 application, therefore the application exe is located in C:\MyProject\Win32\Debug\MyProject.exe.
Note: You may optionally have the DLL files located in a Windows search path such as the Windows or System folder and not be required to have them in the same folder as your executable. More information can be found in this topic on Microsoft's website.
Your project folder should look similar to the following.

Add the IP2LIB.pas file to the project. This file contains the function definitions and Constants needed to use the Instant Protection PLUS 3 DLL with Delphi.
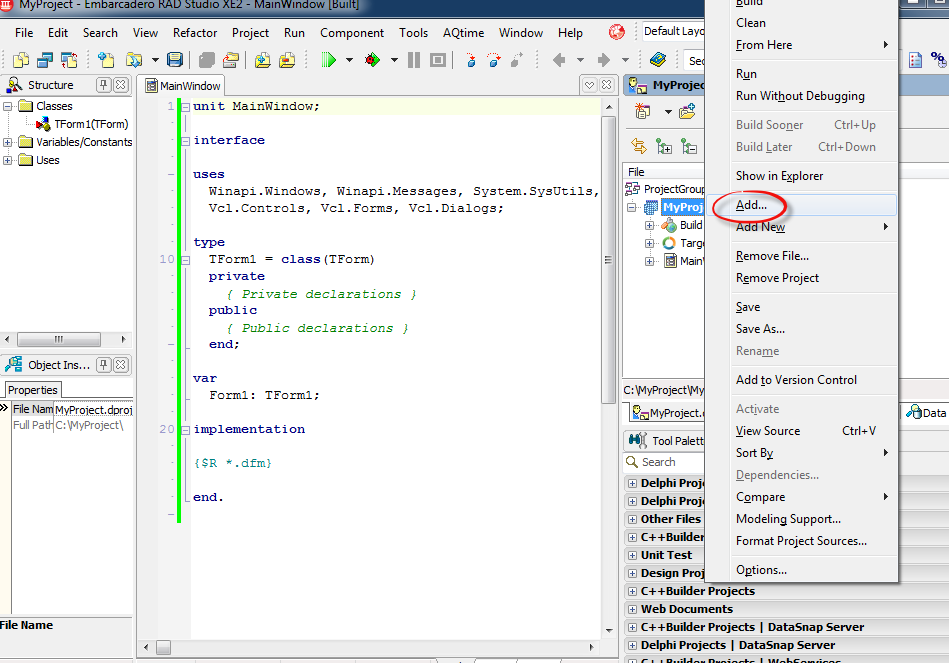
In the Project Manager window, right-click the project name in the tree. Select Add from the context menu.
Browse to the IP2LIB.pas file now copied to your project folder and select open.
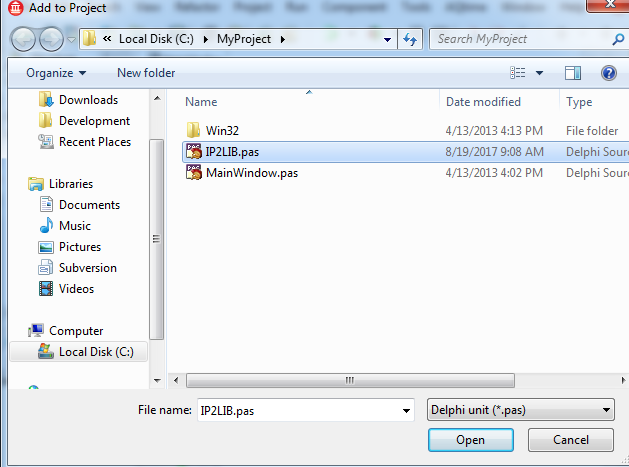
Once added, the file will show in the Project Manager window.
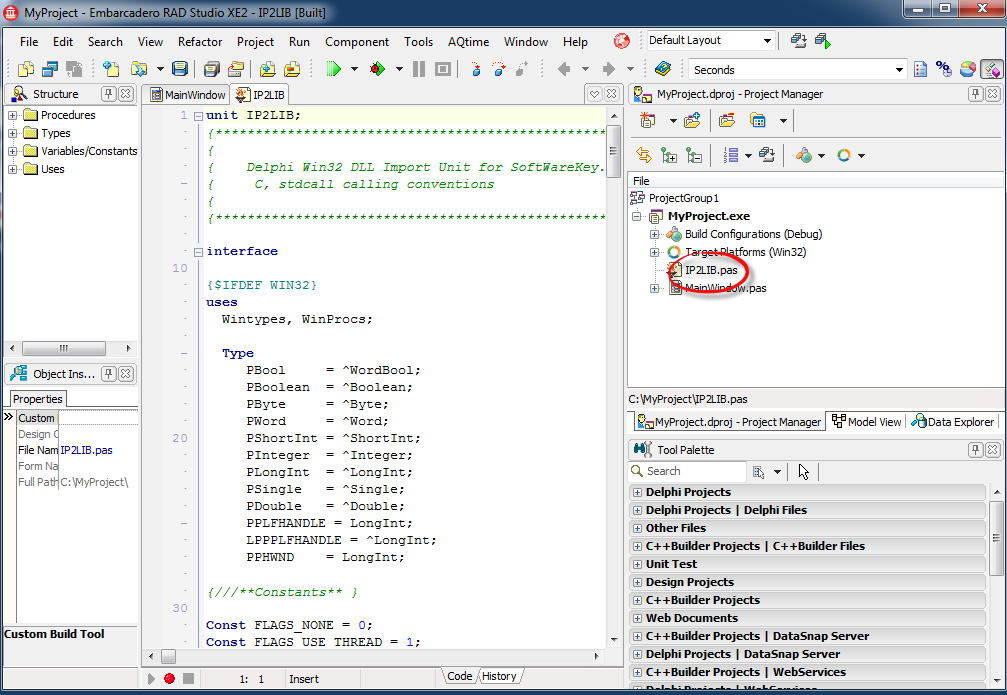
The first source code change required is to include IP2LIB under the uses statement in the MainWindow.pas file. If adding the code to your own application, this change should be implemented in the file which either has the source code for starting your application up or your application's main window.
Open the MainWindow.pas file by double-clicking it in the Project Manager window. At the top under the uses section add the IP2LIB reference. The uses section should look like the following.
uses
Winapi.Windows, Winapi.Messages, System.SysUtils, System.Variants, System.Classes, Vcl.Graphics,
Vcl.Controls, Vcl.Forms, Vcl.Dialogs, IP2LIB;
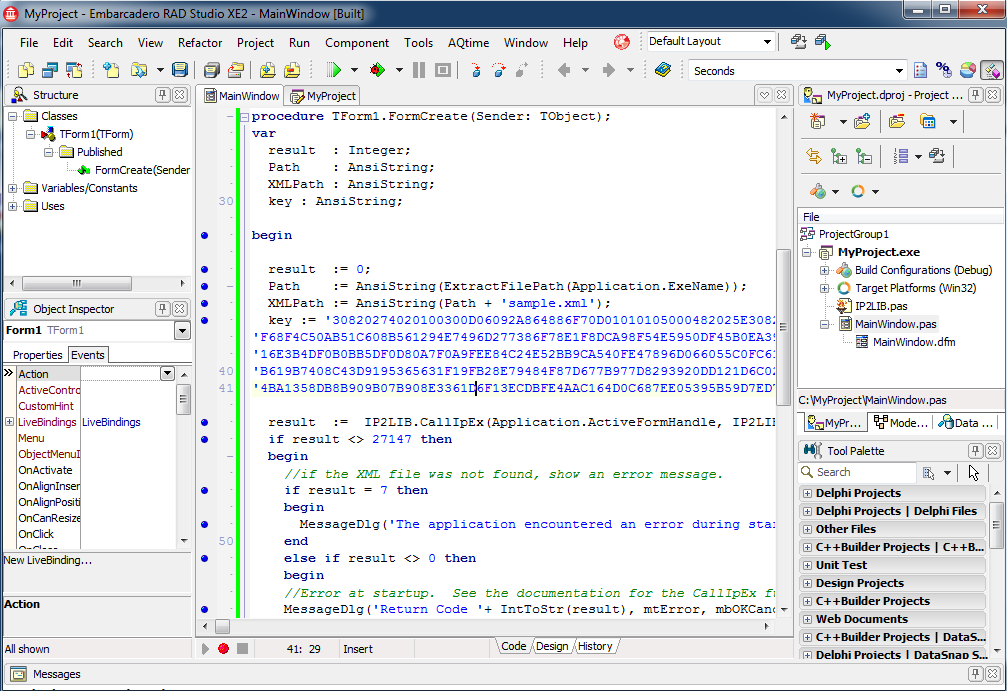
Add the OnCreate event to the Form. In the Project Manager window click the plus symbol beside the MainWindow.pas file in the tree. The MainWindow.dfm will be shown beneath it. Double-click the MainWindow.dfm file. Form1 will be shown in the center designer window. Double-click on the form in the designer window.
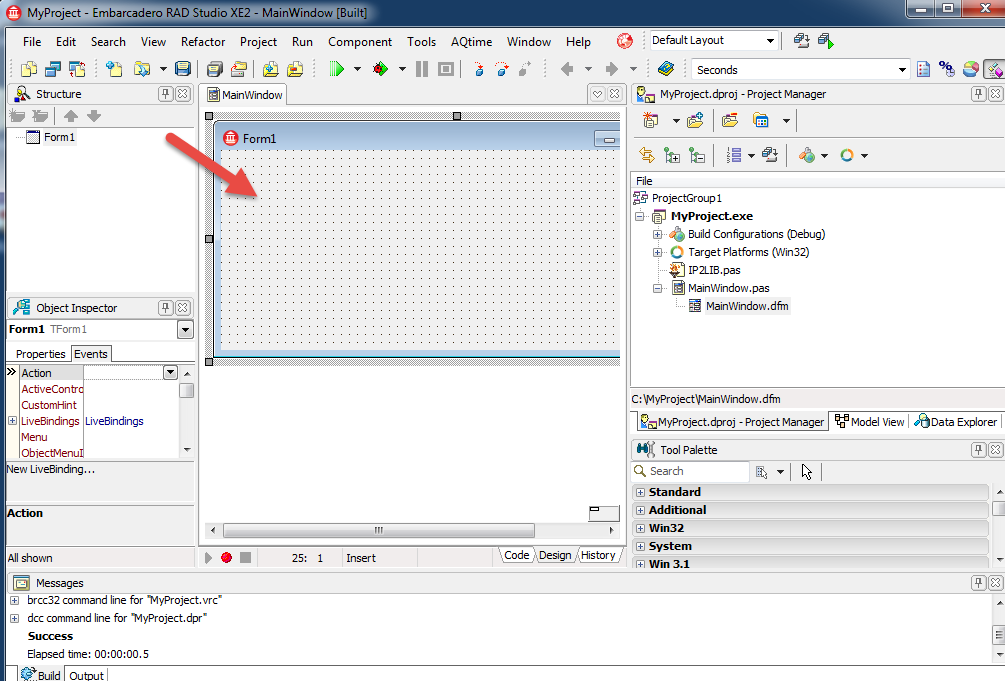
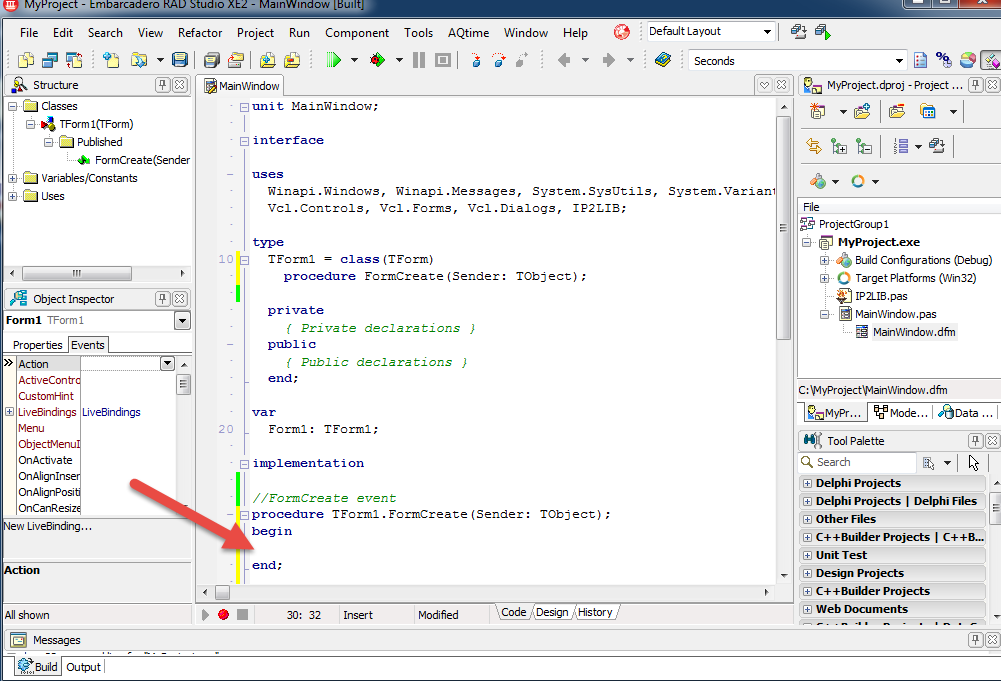
This will generate the FormCreate event where we will add our code.
You will now need to generate some code to use with your application. You can obtain the Delphi code shown below with the return key/return code and Decryption Key specific to your .ipp file already in place by using the Instant Protection PLUS 3 DLL Integration Assistant. To use this method simply: Run Instant Protection PLUS 3 DLL Integration Assistant.
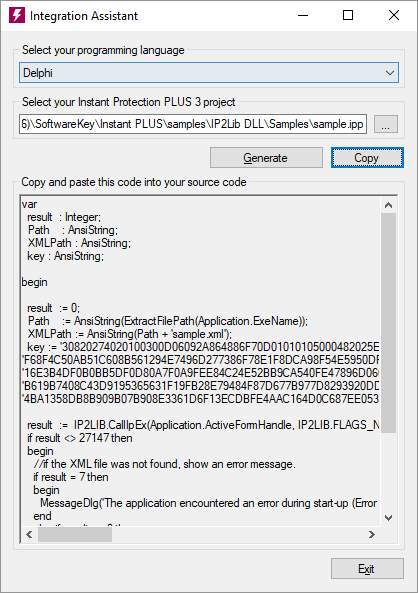
The next step is to add the code into the application/main window initialization/start-up code. In our Delphi example application, this is in the Form's FormCreate procedure. Paste the code from the Integration Assistant into the FormCreate procedure replacing the begin end; statements that were auto-created when we added the procedure.

Once you have this code in place you may proceed to step 4.
As an alternative to using the Instant Protection PLUS 3 DLL Integration Assistant you can copy the code below and paste it into the Form's FormCreate procedure as shown above. If you choose to copy the sample code below be sure to follow the important steps to make the appropriate changes.
The source code modifications have been made, the required project property changes have been made, and the only thing left to do is to compile and run. If this is the first time you are building your project, you can build the project then copy the required files to the build folder.
Make sure the correct DLL is in the build folder with your new executable file (See step 2 above).
if you have already created an xml file using the Instant Protection PLUS 3 wizard, copy it to the appropriate build directory. For example, if you are compiling the Debug build, you will need to copy the XML file to the Debug directory where the compiled program is located. Likewise, you will also need to do this for your Release build and any other build configurations you might create.
In this guide, I will use the sample.xml file distributed with Instant Protection PLUS 3. Copy the sample.xml file from %PROGRAMFILES(X86)%\SoftwareKey\Instant PLUS\samples\IP2Lib DLL\Samples\ to the build folder containing your newly built application executable. You can also copy the sample_splash.bmp file from the same folder to show a splash screen.
The xml file contains all the licensing parameters created by the Instant Protection PLUS 3 wizard.
Once the XML file is in the same place as your program, you can run your application and test.
The application must be properly deployed in order to function correctly on a 'clean' machine that has not previously had Instant Protection PLUS 3 installed. The Instant Protection PLUS 3 DLL library files must be installed to the same folder as the application executable, or a Windows DLL search path along with any custom splash screen or product logo images. It is recommended to use a helper executable to initialize the license files to avoid permissions issues on Windows Vista and later. These requirements are described in detail in the Deployment topic.