This is a guide which shows you the steps taken to create the Java example for the Instant Protection PLUS 3 DLL. Java SE 7 was used to compile this example. The instructions would be similar for other versions of Java SE. This example was compiled using the 32-bit version of the javac command and ran under the 32-bit Java Virtual Machine (JVM). Refer to the important steps note under the Step 4 - Deploy section for details on 64-bit compatibility.
Download the latest jna.jar file from https://github.com/java-native-access/jna and save it to the sample directory. JNA version 3.3.0 was used in this sample, but other versions should be compatible. Copy the file into the samples\IP2Lib DLL\Samples\Java subdirectory under the Instant Protection PLUS 3 installation folder.
When integrating this into your own application, there are a few very important steps you need to take to ensure the sample.ipp file cannot be used by a hacker to circumvent your application's protection:
To compile this sample, first determine the Java Development Kit (JDK) binary directory. For example, C:\Program Files\Java\jdk1.7.0\bin. Open a command prompt and change directory to the samples\IP2Lib DLL\Samples\Java directory, then run the javac command to compile the Java source to byte code:
Note that you will typically need to use the absolute path to javac.exe (which varies on the version of Java installed). The commands above can be copied into a .bat file in the samples\IP2Lib DLL\Samples\Java directory for convenience.
The samples do ship with Eclipse project files. You can use the File/Import... menu to import an existing project into your workspace, and specify this sample's directory. Once imported, you will need to right-click on the project, click Properties, select "Java Build Path" on the left, select the "Libraries" tab, click "Add JARs...", and select the jna.jar file you downloaded in step 1 (which should have been copied to the same directory as the .project file). Once the project is configured, you can use the Project/Build Project menu to compile the sample.
The samples also ship with NetBeans project files. Once the sample is opened with NetBeans, a "Project Problems" dialog will likely be shown stating there is a missing reference. Click the Resolve Problems... button. The error should show that the jna.jar file is not found. This is the file you downloaded in step 1. Click the Resolve button and browse to your downloaded jna.jar file. The dialog should show the problem was resolved. Click the close button.
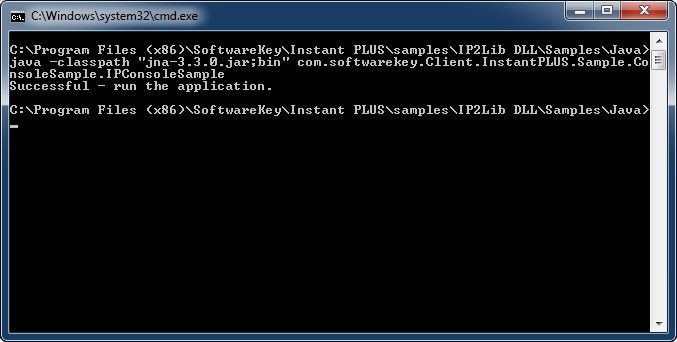
To run this sample, first open a command prompt and change directory to this sample's directory, then run the java command to run the program:
"java.exe" -classpath "bin;jna.jar" com.softwarekey.Client>InstantPLUS.Sample.ConsoleSample.IPConsoleSample
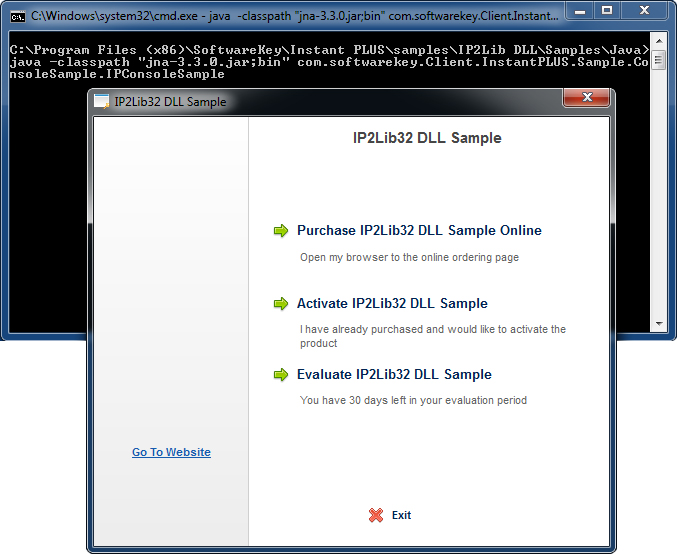
Click 'Evaluate' to allow the application to run.
You can provide the full path to java.exe file in the Java Runtime Environment (JRE) binary directory (i.e. C:\Program Files\Java\jre7\binor C:\Program Files (x86)\Java\jre7\bin). This can, for example, be used to control whether your tests are run in a 32 bit JRE or a 64 bit JRE (and you will want to test both).
The Java perspective in Eclipse typically includes a "Run" button on the toolbar that has a drop-down menu. Simply click the arrow on this button and select to run either IPConsoleSample or IPApiConsoleSample as a Java application.
The application must be properly deployed in order to function correctly on a 'clean' machine that has not previously had Instant Protection PLUS 3 installed. The Instant Protection PLUS 3 DLL library files must be installed to the system directory along with any custom splash screen or product logo images. It is recommended to use a helper executable to initialize the license files to avoid permissions issues on Windows Vista and later. These requirements are described in detail in the Deployment topic.
The sample is hard-coded to load IP2LIB32.DLL in IPJnaSample.java where Native.loadLibrary() is called. The 64-bit version of the Instant Protection PLUS 3 DLL is named IP2LIB64.DLL. In order for this to work with the 64-bit JVM the 64-bit version of the Instant Protection PLUS 3 DLL must be loaded. To avoid complicating the code and conditionally loading the correct DLL, you can simply rename IP2LIB64.DLL to IP2LIB32.DLL and install to the appropriate system directory.