This is a guide which shows you the steps taken to create the LabVIEW example for the Instant Protection PLUS 3 DLL.
The easiest way to license a LabVIEW 32-bit executable is through the Instant Protection PLUS 3 wrapper. To protect 64-bit executables or to use the Instant Protection PLUS 3 API, we have provided the instructions below.
Browse to the installation directory (usually C:\Program Files (x86)\SoftwareKey\ or C:\Program Files\SoftwareKey\), go to the "Instant PLUS\samples\IP2Lib DLL\Include\LabVIEW" sub-directory. Copy the following files to your project folder:
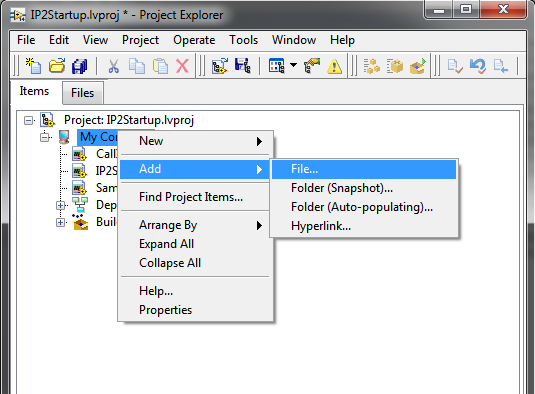
Open your LabVIEW project and add the copied files to your project.
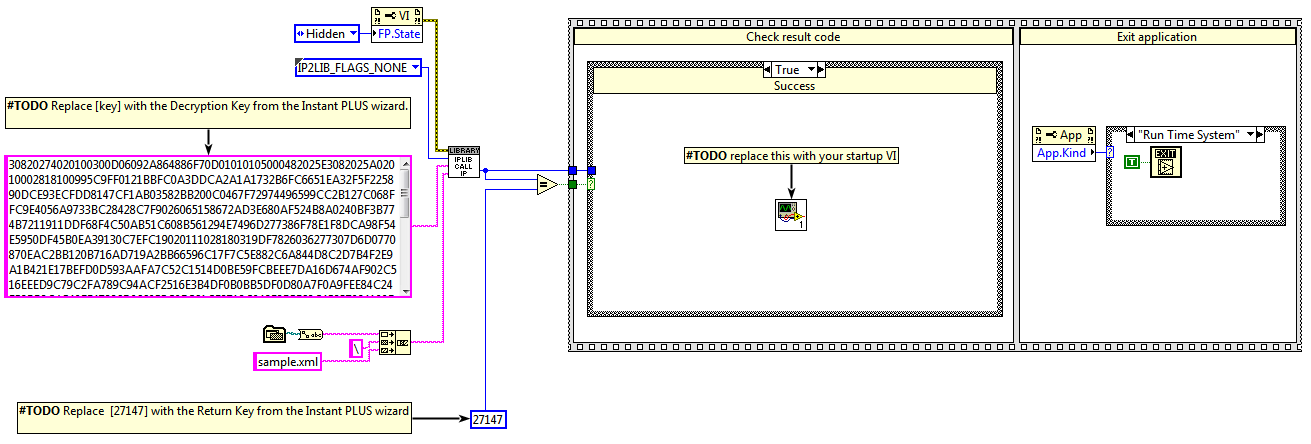
Double click IP2Startup.vi and open the block diagram (Window ->Show Block Diagram or CTRL+E). All of the necessary modifications are bookmarked with a <#TODO> comment.
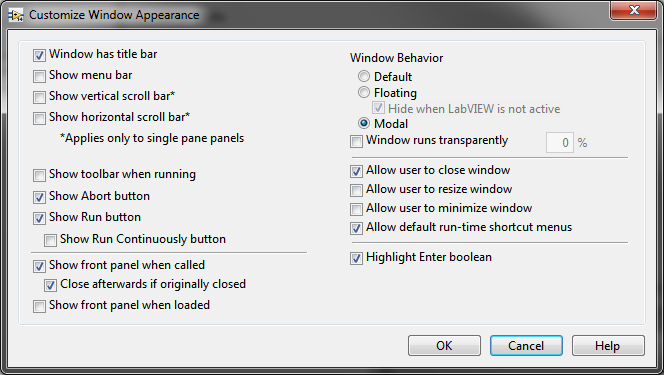
In your LabVIEW project, you will need to add the Instant Protection PLUS 3 DLLs and your XML file to your project as described in the in the deployment topic. Next, open the main or startup VI of your LabVIEW project. Go to File -> VI Properties menu. Select the Window Appearance category. Click the customize button and check the "Show front panel when called" check box.
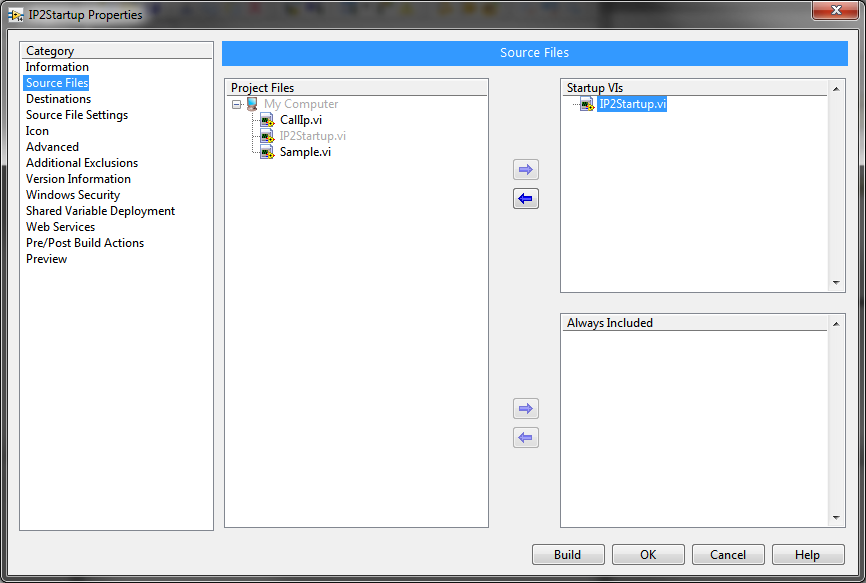
You will need to change the build specifications of your executable to use IP2Startup.vi as your startup VI. Under Build Specifications, right-click your executable , and click Properties. Click on "Source Files" and remove all VIs from the "Startup VIs" section. Select the IP2Startup.vi and include it in the "Startup VIs".
To correctly initialize the license files (to avoid permission issues on Windows Vista or later) follow the next steps:
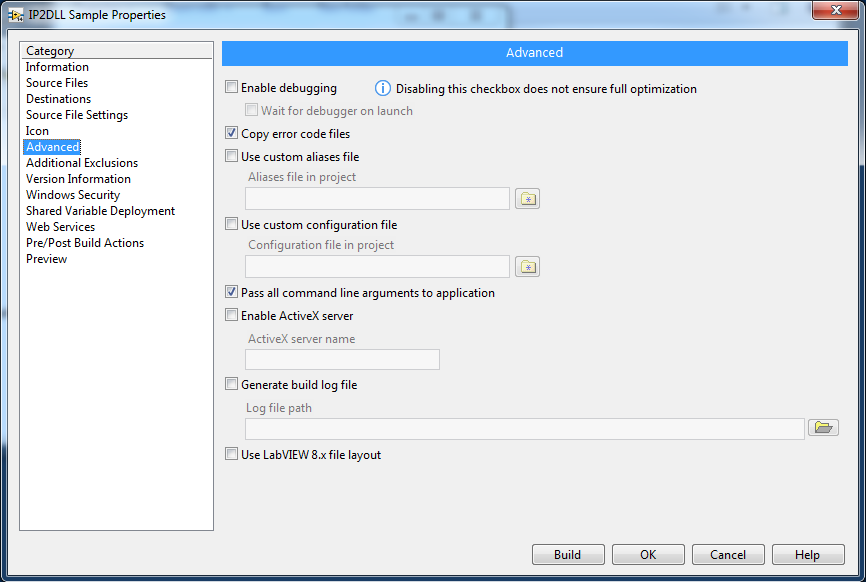
Below the Build Specifications of your project, right-click your executable and click Properties. Click on "Advanced" and check the "Pass all command line arguments to application" check box. This will help your application correctly respond to the /OPENLF flag described in step 4.
Once you have configured all of your build specifications, click Build. When your executable runs, it will check the Instant Protection PLUS 3 license first. Upon validation, it will pass the execution control to the main VI of your project. When testing your application, be sure to copy your XML file into your executable's build directory. To find your executable's directory, right-click your executable and click Explore.
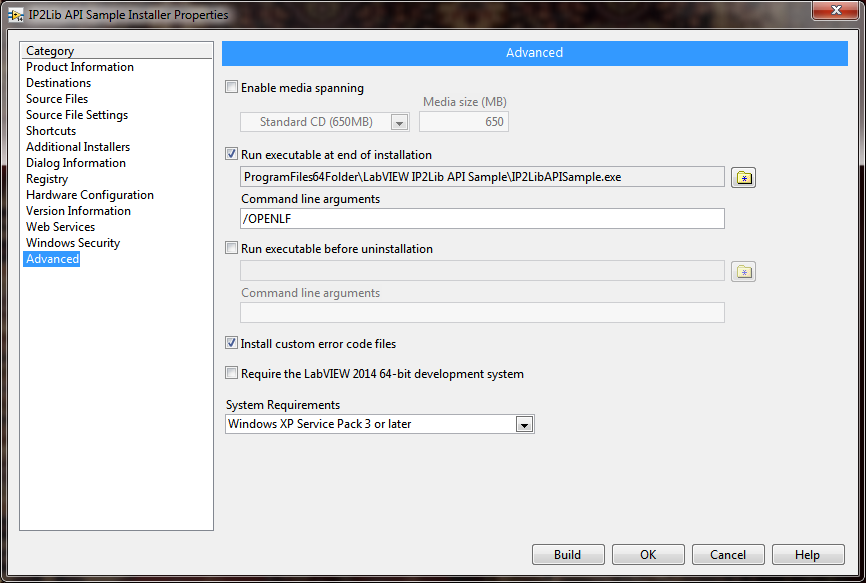
When you are ready to create your application's installer, right-click your installer below the Build Specifications and click Properties. Click on "Advanced" and check the "Run executable at end of installation". Below the command line arguments, enter "/OPENLF" into the text box. Click OK.
The application must be properly deployed in order to function correctly on a 'clean' machine that has not previously had Instant Protection PLUS 3 installed. The Instant Protection PLUS 3 DLL library files must be installed to the system directory along with any custom splash screen or product logo images. Your XML file will need to be deployed to your application's installation folder. These requirements are described in detail in the deployment topic.