This is a guide which shows you the steps taken to create the MFC Early Binding (also known as Implicit Linking) example for the Instant Protection PLUS 3 DLL. If you are unsure about the differences between early and late binding, please view the Samples Overview for an overview of the differences.
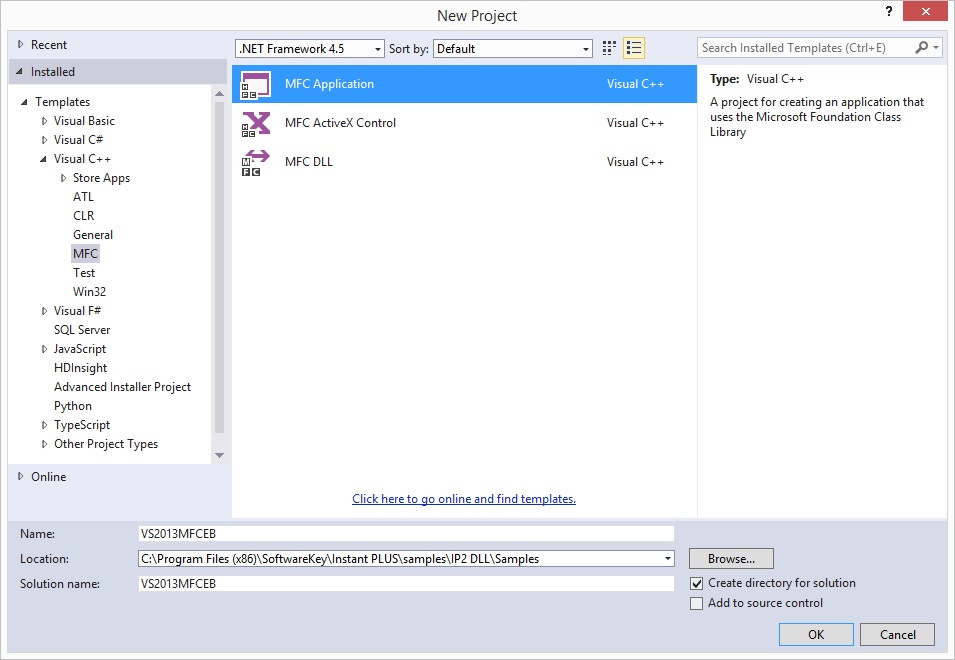
Open Visual Studio, click File, then New, and then Project... Select the Visual C++ MFC project type on the left, and then select MFC Application on the right. For integration with an existing project, this step may be skipped.
This will take you to the MFC Application wizard included with Visual Studio. Per the screen shot below, we created the sample as a Dialog based application which statically links the MFC library.
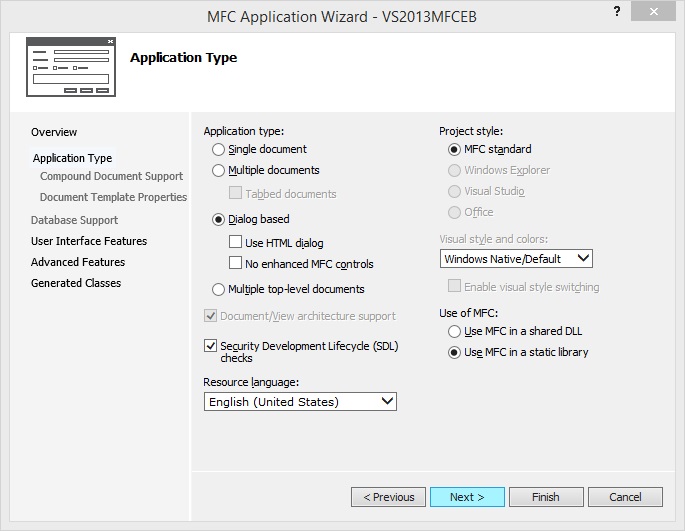
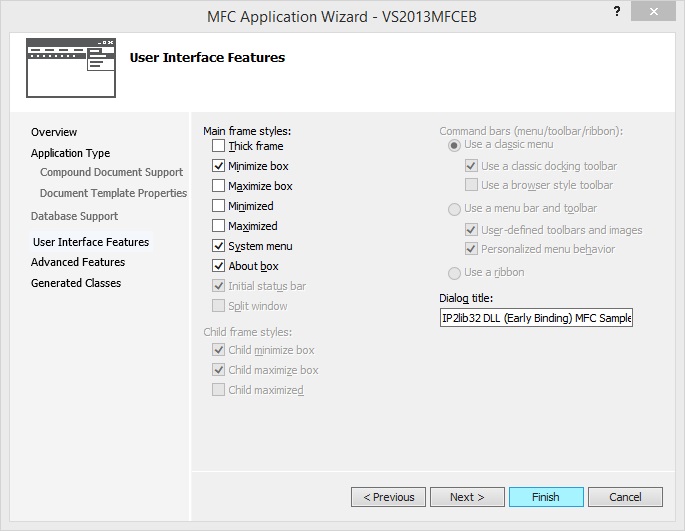
Next we set the dialog title and simply clicked the Finish button, leaving the defaults on the remaining steps.
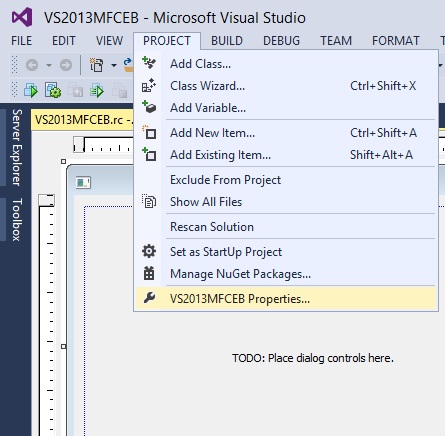
Some project settings need to be changed so that required files may be found. Open the project settings by clicking the Project menu and clicking Properties as shown below.
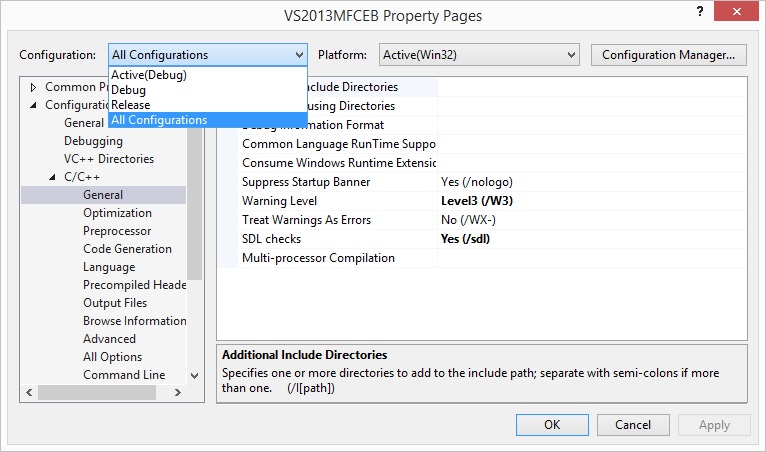
Next, select "All Configurations" from the drop-down menu at the top of the project settings dialog. Then, on the left, select the Configuration Properties > C/C++ > General section. A screen shot is provided below to show where this is found.
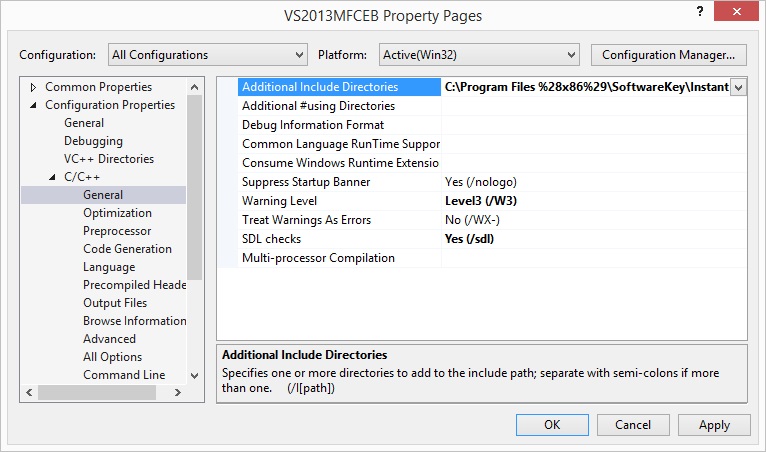
Now we need to add the include directory so that Visual C++ may find the required include file for the Instant Protection PLUS 3 DLL. In the installation directory (which is C:\Program Files\SoftwareKey\ by default), this is located in the "Instant PLUS\samples\IP2Lib DLL\Include" subdirectory. Add the appropriate path to "Additional Include Directories" as shown below.
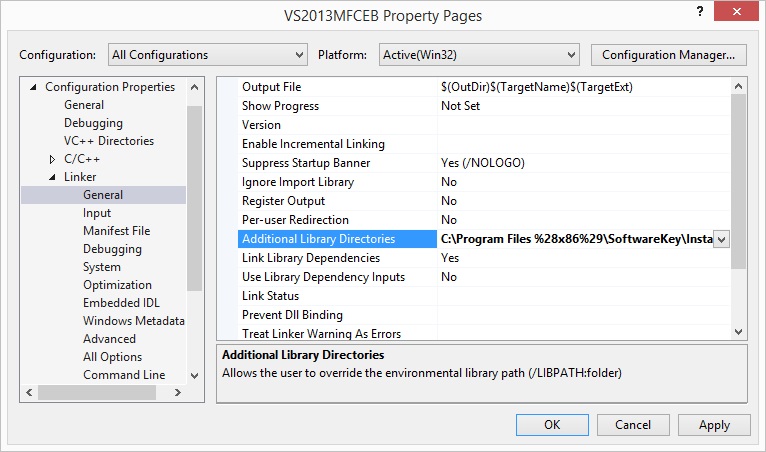
After that, we need to add the additional library directory so Visual C++ may find the required import library for the Instant Protection PLUS 3 DLL. In the project property screen, select the Configuration Properties > Linker > General section. In the installation directory (which is C:\Program Files\SoftwareKey\ by default), this is located in the "Instant PLUS\samples\IP2Lib DLL\Library" subdirectory. Add the appropriate path to "Additional Library Directories" as shown below.
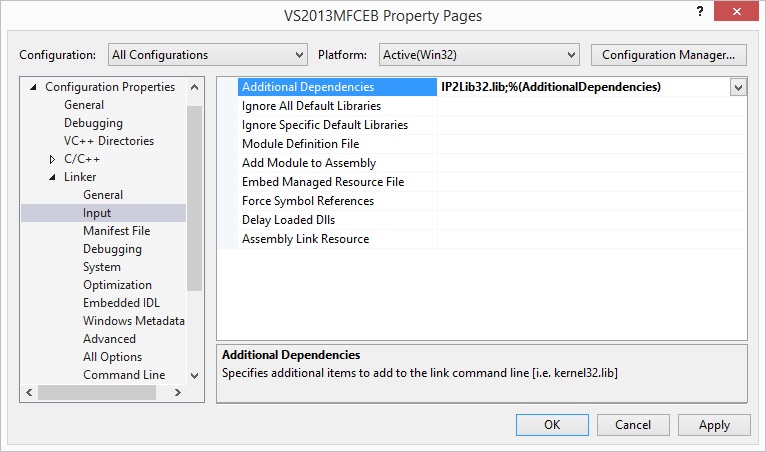
Next, we need to add the import library to the project settings. This is done by selecting the Configuration Properties > Linker > Input section on the left, and adding "IP2Lib32.lib" to "Additional Dependencies" as shown below. If you are creating x64 builds, please repeat all prior instructions in this step and use "IP2Lib64.lib" for the all configurations for the x64 platform.
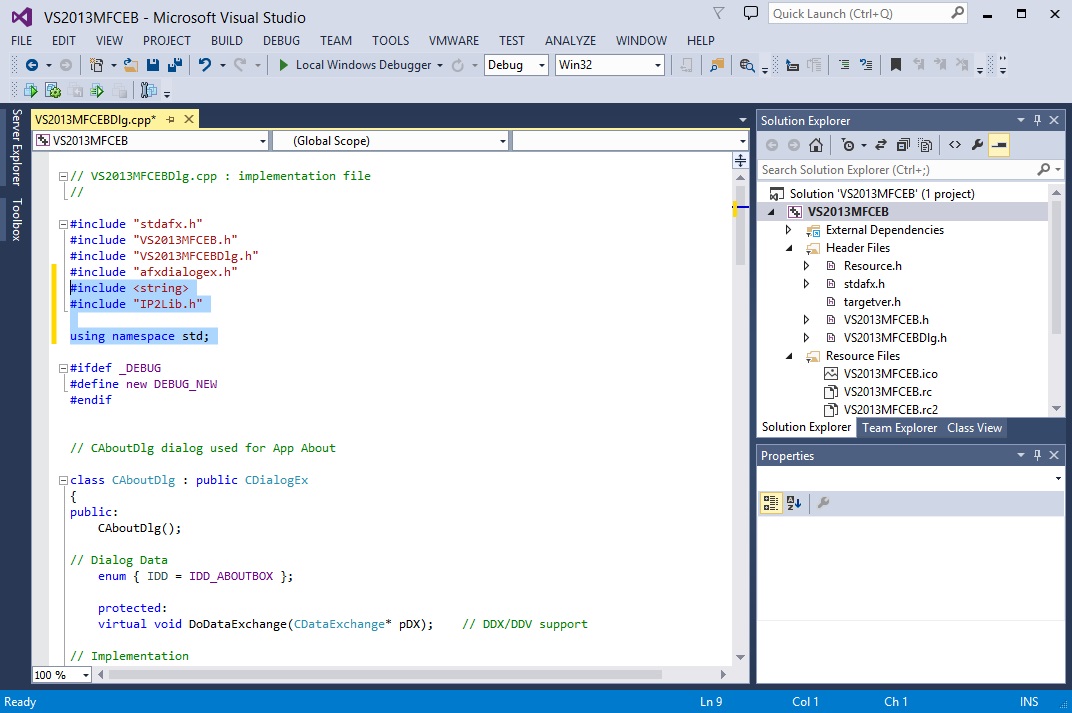
The first source code change required is to include the required header files in the appropriate source file. This change should be implemented in the file which either has the source code for starting your application up or your application's main dialog. For this example, the main dialog is where we added the changes, which was the IPEarlyBindSampleDlg.cpp file. At the top of the file, add the following includes statements:
If the string header file is already being included, you may omit that include statement. Likewise, if you already have a using statement for the std namespace, you may also omit that. A screen shot is also provided below to help show where this code needs to be pasted.
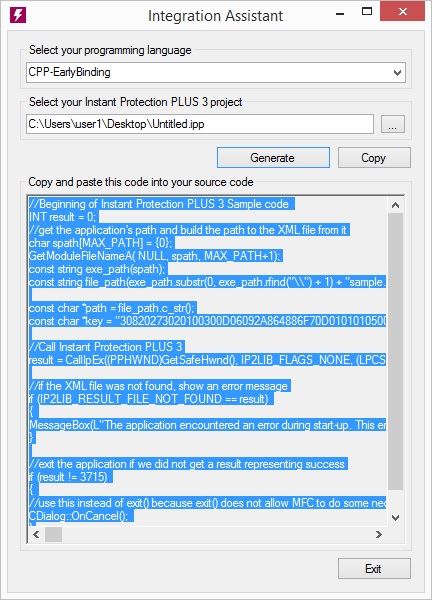
You will now need to generate some code to use with your application. You can obtain the CPP code shown below with the return key/return code and Decryption Key specific to your .ipp file already in place by using the Instant Protection PLUS 3 DLL IntegrationAssistant. To use this method simply: Run Instant Protection PLUS 3 DLL Intergration Assistant. Select the language that your application is coded in (in this sample we are using CPP-EarlyBinding). Select your applications .ipp file. Click "Generate" and then click "Copy" to save the code to your clipboard. Here is a sample of what the interface should look like.
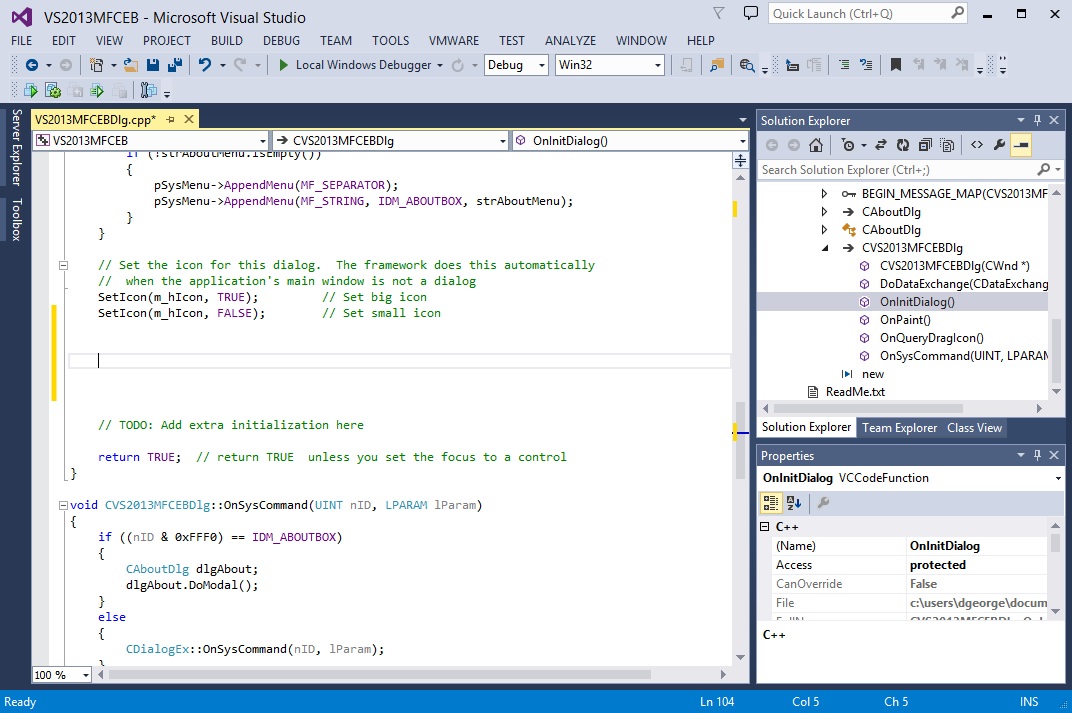
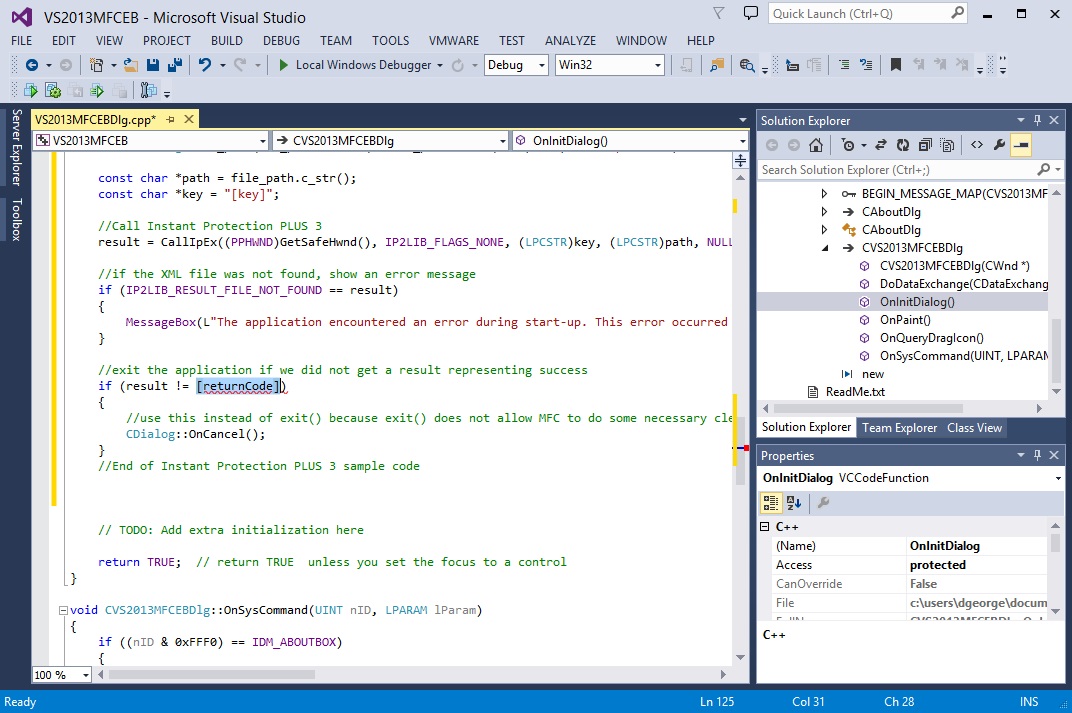
The next step is to add the code into the main dialog's initialization/start-up code. In the MFC example, this is in the dialog's OnInitDialog method. The code we will need to add is toward the end of that function, just above the return statement as shown in the screen shot below. You will see that the cursor in this screen shot is between the SetIcon statement and the TODO comment, as this is where we will add code.
Once you have this code in place you may proceed to step 4.
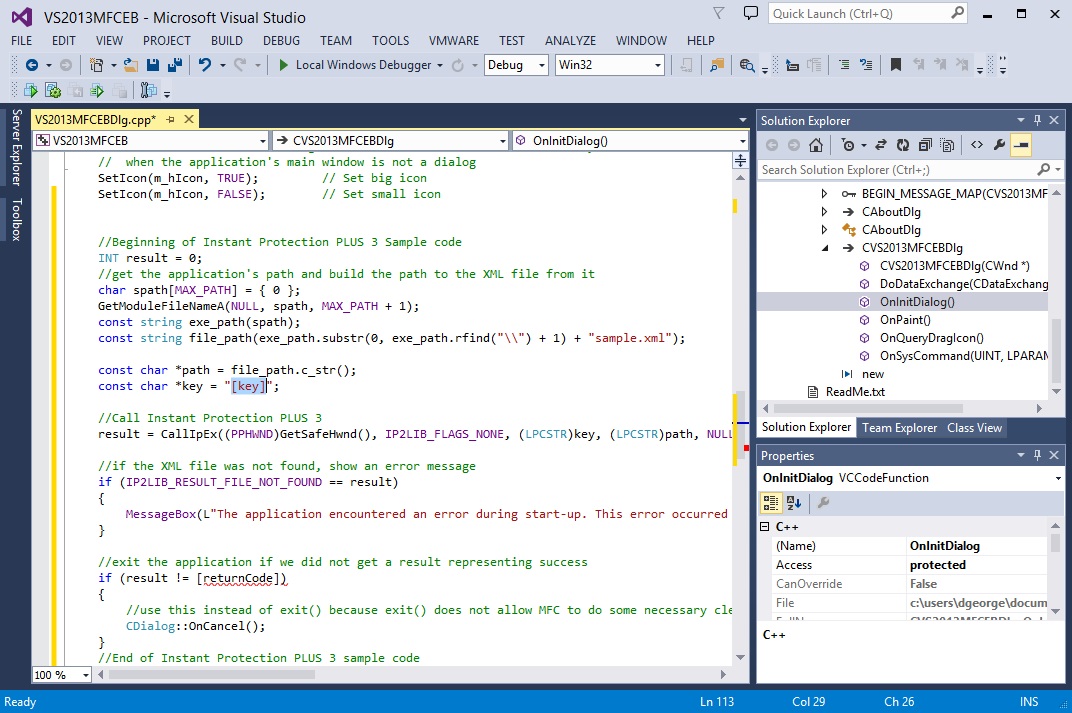
As an alternative to using the Instant Protection PLUS 3 DLL Intergration Assistant you can copy the code below and paste it into the dialog's OnInitDialog method as shown above. If you choose to copy the sample code below be sure to follow the important steps to make the appropriate changes.
The screen shots below gives an example of where the code should be edited as explained in the important steps.
The source code modifications have been made, the required project property changes have been made, and the only thing left to do is to compile and run. If this is the first time you are building your project, you can build the project first. Once you have successfully built, make sure you copy the XML file you saved from the Instant Protection PLUS 3 wizard's File Output step to the appropriate build directory. For example, if you are compiling the Debug build, you will need to copy the XML file to the Debug directory where the compiled program is located. Likewise, you will also need to do this for your Release build and any other build configurations you might create. Once the XML file is in the same place as your program, you can run it and test.
The application must be properly deployed in order to function correctly on a 'clean' machine that has not previously had Instant Protection PLUS 3 installed. The Instant Protection PLUS 3 DLL library files must be installed to the system directory along with any custom splash screen or product logo images. It is recommended to use a helper executable to initialize the license files to avoid permissions issues on Windows Vista and later. These requirements are described in detail in the Deployment topic.