The License Manager encryption key data and interface can be customized to help you better manage your license files. License Manager comes with a default profile, which includes two files located at %PUBLIC%\Documents\SoftwareKey\Protection PLUS 5\License Manager in Windows Vista and later. The first file is LicenseManagerProfile.xml, which initially contains sample encryption key data meant for evaluation and testing purposes only. Never distribute production applications that use the sample/test envelope data! Before releasing your applications, you must request and use your own encryption key data. The second file is the GridFieldLayout.xml file, which includes license file field/schema descriptions.
If you are managing products from different companies or departments, or if you have multiple SOLO Server author accounts (each of which will have different encryption key data), you would need to create and manage multiple License Manager profiles. You can also have a profile with customized license fields and descriptions. Before you begin configuring a new profile to use production encryption key data, you should first activate using your primary/default profile. Otherwise, you may need to activate each profile separately.
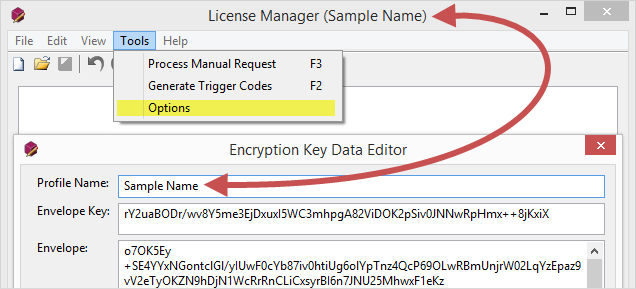
With this set, you can now go to your start screen or menu and click on your new shortcut. (You may need to type License Manager at the start screen or menu to find the new shortcut.) This will launch License Manager with your new profile, which you can configure using the Tools / Options menu to set your alternate encryption key data, profile name, etc.
To make sure you know which profile is currently being used, click the Tools / Options menu, and set the profile name. This name will appear in the title bar of License Manager. The profile name may only be configured when using the /resourcePath switch to use a different profile.
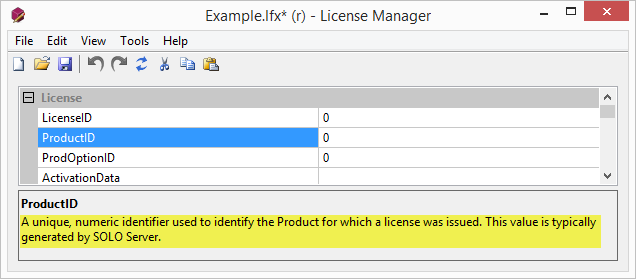
Whenever you click on a license field in the License Manager interface, it lists a description at the bottom of the window. You can customize the description of each field to better describe your particular use of that field. This can be especially useful when training new employees to use License Manager and better understand the values that they are setting.
To change this description, edit the GridFieldLayout.xml file you copied into :"%PUBLIC%\Documents\SoftwareKey\Protection PLUS 5\License Manager\Sample Name" (see above for setting up a new profile). You can change the description for a particular field by editing the text inside the <HelpString> tag for that <Field>:
You should only consider making any changes to GridFieldLayout.xml if you are comfortable with XML.
While you can add new, custom fields, you should never delete anything. Additionally, you may only modify the HelpString when editing existing/standard fields (altering anything else will break compatibility with Protection PLUS 5 SDK). Any customizations cannot be officially supported, and could have the potential to be incompatible with future versions of License Manager and Protection PLUS 5 SDK. As always, we recommend keeping back-ups of your GridFieldLayout.xml file(s) if you do make any additions (keeping track of changes using a Version Control System is an ideal way to do this).
It is possible to add custom fields to License Manager, which will then be available in the license files. This brief guide will use the SimpleTextEditor sample from the PLUSManaged API to demonstrate how this functionality can be used for feature-based licensing.
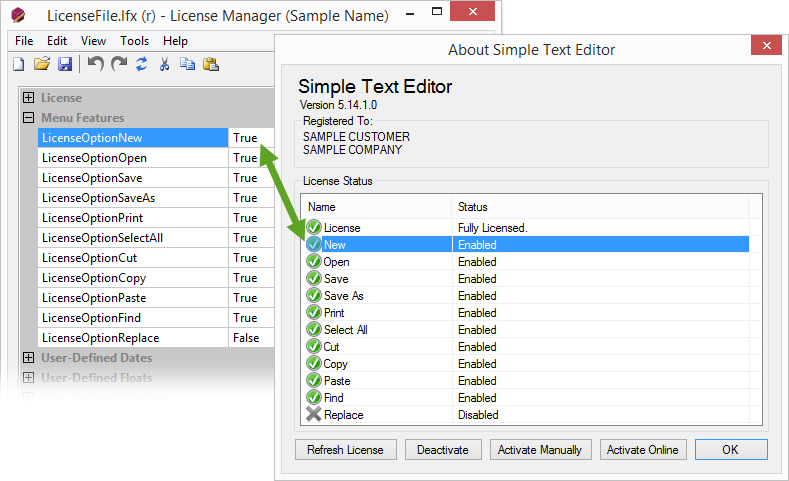
The SimpleTextEditor sample has the following menu options that can be enabled or disabled: New, Open, Save, Save As, Print, Select All, Cut, Copy, Paste, Find, Replace. The license file needs to contain data that the application will read so it knows whether to enable or disable these features. The SimpleTextEditor sample is configured to enable/disable the menu option based on the LicenseCustomData field using a block of custom XML. The following would disable all menu options:
Updating or modifying the XML directly is not ideal, as the text box does not format the XML.
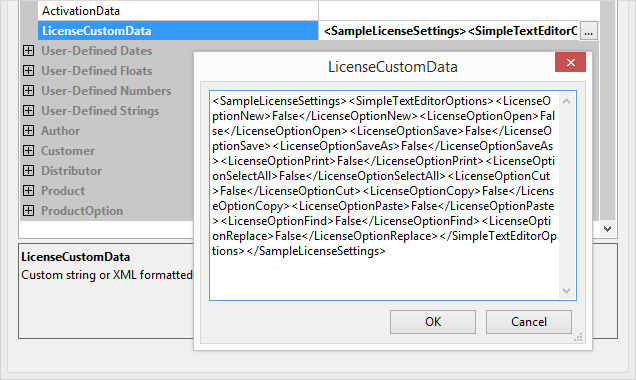
To address this, you can add custom fields for each feature into the License Manager interface. These fields will use the same XPaths as the data in the LicenseCustomData field, and will make it easier to set individual features as opposed to editing the XML directly.
To add the custom Menu Features category and LicenseOption* fields to License Manager, make the following additions to GridFieldLayout.xml after the License category and before the User-Defined Dates category:
Once you save the license file, the SimpleTextEditor sample will read this license file and enable/disable features accordingly.