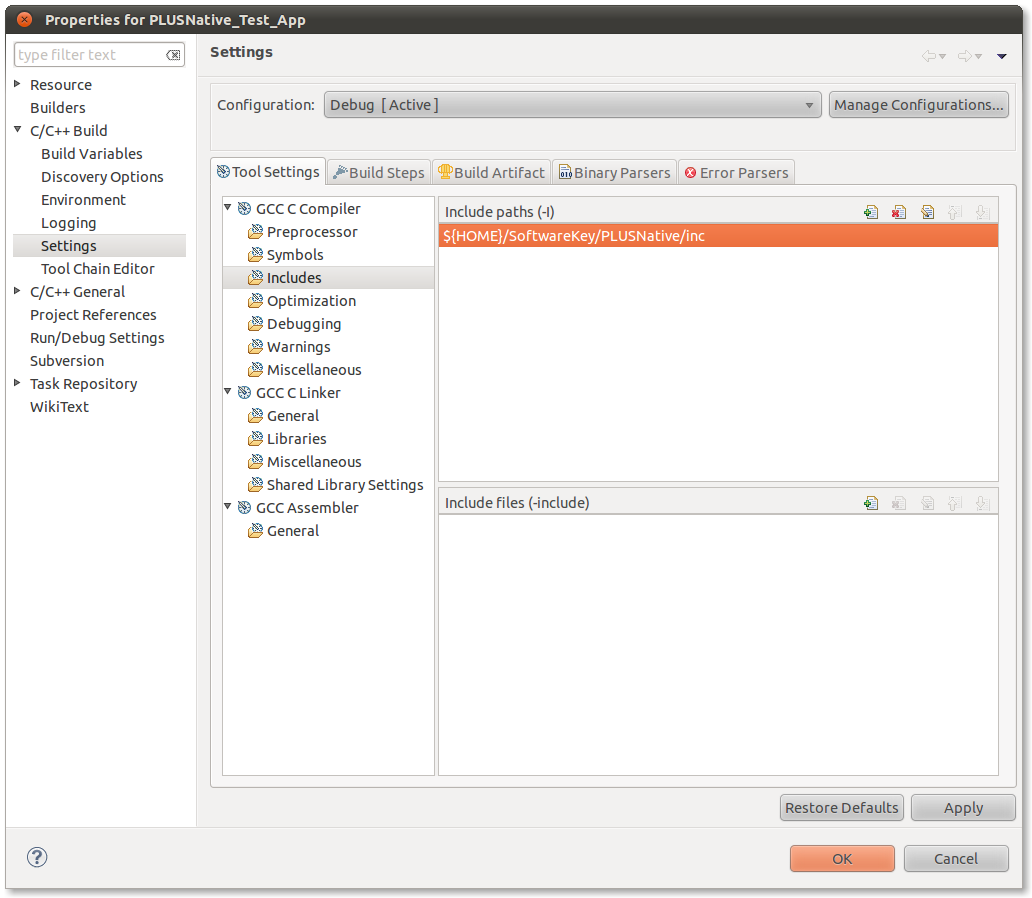
In order for the compiler to locate the PLUSNative.h header file that gets included with your source code you should add the SoftwareKey/PLUSNative/inc directory your Eclipse project's include search path. Start by opening up your project's properties page. This is done by right-clicking the project name in the Project Explorer and clicking Properties. Expand the C/C++ Build tree from the left and select Settings. Under the GCC C Compiler settings select Includes. Click the green plus (+) to the right of the Include paths (-I) section and add the path to the PLUSNative include directory (e.g. SoftwareKey/PLUSNative/inc).
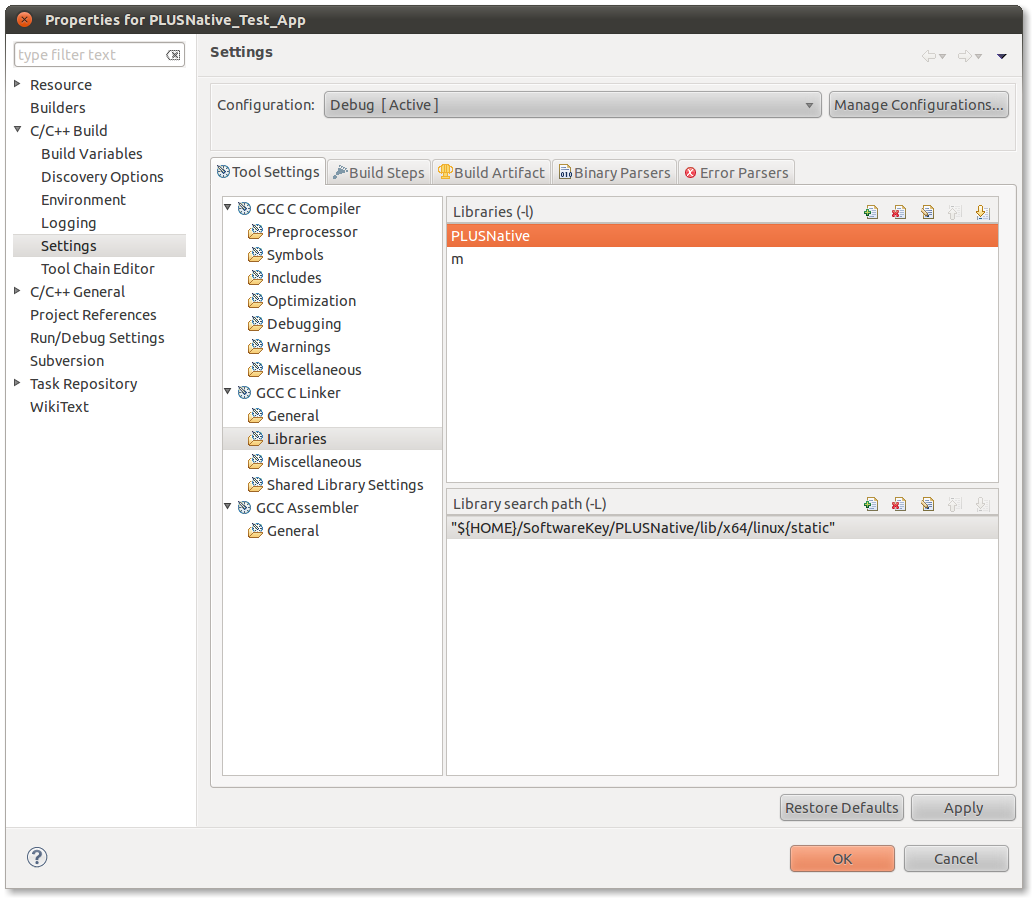
In order for the linker to locate the PLUSNative library file you will need to add the SoftwareKey/PLUSNative/lib/... directory your Eclipse project's library search path. Start by opening up your project's properties page. This is done by right-clicking the project name in the Project Explorer and clicking Properties. Expand the C/C++ Build tree from the left and select Settings. Under the GCC C Linker settings select Libraries. Click the green plus (+) to the right of the Library search path (-L) section and add the path to the PLUSNative library directory. The PLUSNative library directory will vary depending on whether you are using the 32-bit or 64-bit shared or static library. This example uses the 64-bit static library and sets the PLUSNative library search path to SoftwareKey/PLUSNative/lib/x64/linux/static.
After setting the library search path, you must tell the linker which libraries to link. Click the green plus (+) to the right of the Libraries (-l) section and add the PLUSNative library and any of it's system library dependencies.
Do not include the "lib" prefix or the ".a" or ".so" suffix when adding a library. For example, instead of adding libPLUSNative.a, you would simply add PLUSNative.