For ease of use, all of the Protection PLUS 5 SDK sample applications use a generic Test Author account with its own Encryption Key ID . We will use this Test Author account on SOLO Server to generate the License ID and activation password necessary to activate the Sample.
To log into SOLO Server, use the Test Author credentials:
- User ID: test
- Password: test
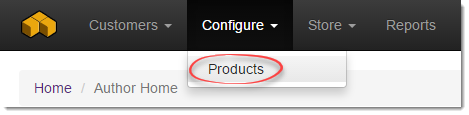
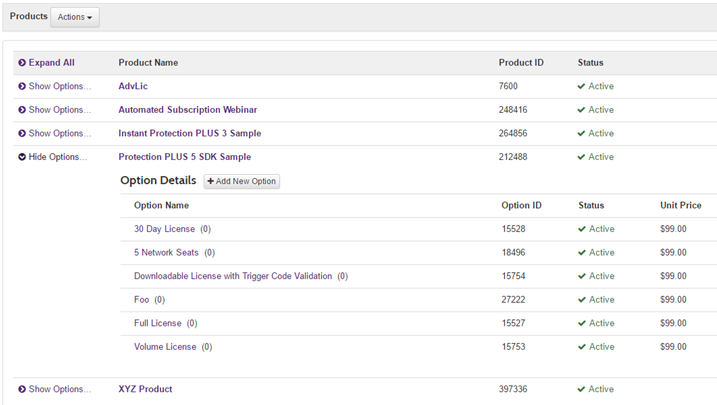
Once logged in, go to the menu Configure / Products.
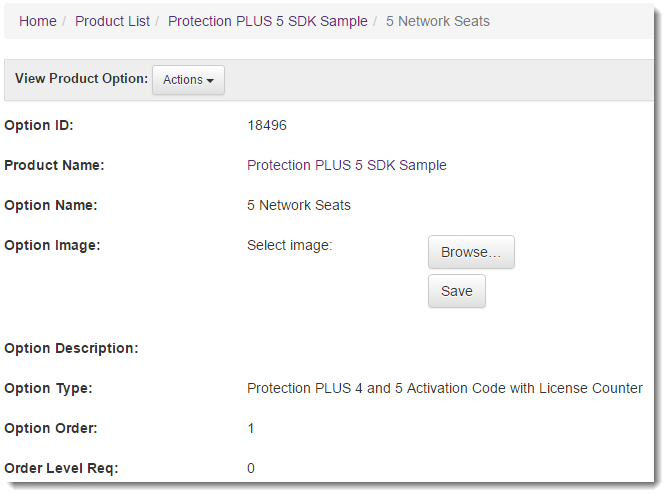
The Product List page will show all of the products available to the Test Author. Expand Show Options beside the Protection PLUS 5 SDK Sample product. The Option Details show different Product Options for activating the sample application. For this tutorial, we will generate a license for the 5 Network Seats.
Creating the License
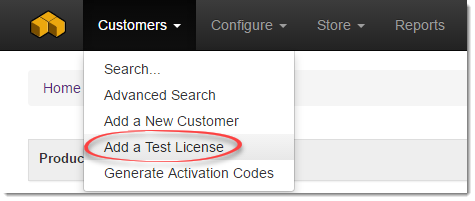
To add a test license, go to the menu Customers / Add Test License.
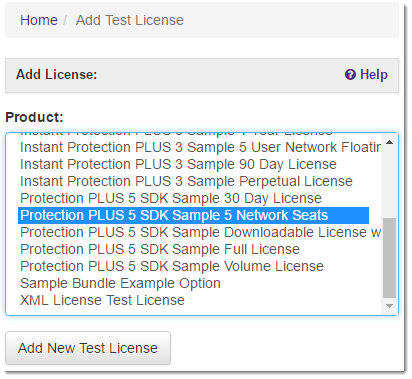
Select Protection PLUS 5 SDK Sample 5 Network Seats and click Add New Test License.
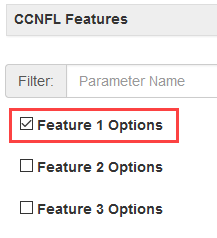
On the Add Test License page, enable the Feature 1 Options at the bottom, and then click Create License.
Test Licenses are meant for software development integration and testing purposes ONLY and should never be sent to a real customer. Test Licenses are DELETED from the license database on the first day of every month.
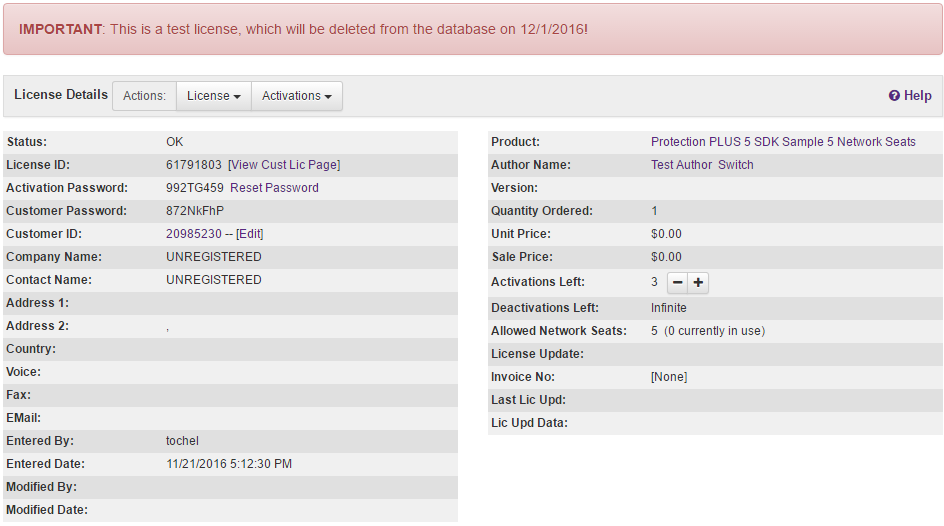
The test license has now been created based on the Protection PLUS 5 SDK Sample 5 Network Seats Product Option settings and attached to a new, unregistered customer record.
Click on the License ID in the Licenses & Other Items section to load the License Details page.
The Test License has now been created. We now have a License ID and an Activation Password to continue testing the sample application.
Activating with the License
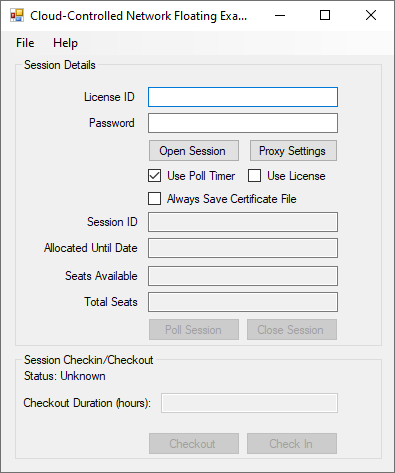
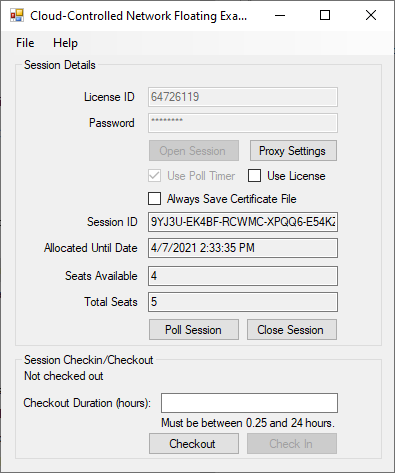
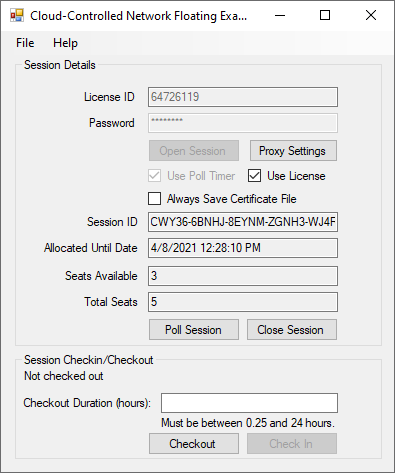
Return to the Cloud-Controlled Network Floating Licensing Sample application.
Enter the License ID and Activation Password in their respective fields. We will review the other settings at the end of this step.
Click Open Session to communicate with SOLO Server for license validation and to open a session.
Upon successful activation, the Session ID, Allocated Until Date, Seats Available, and Total Seats edit boxes will be propagated with values received from SOLO Server. If the activation fails, please verify the information entered with the license details on SOLO Server.
Note the number of Seats Available is 4 out of 5 since we have just used one of the seats with this session.
Proxy Settings
If the customer is using a proxy server that requires authentication, you can allow them to enter their proxy settings so that your application will be able to communicate with SOLO Server.
See the Adding Support for Proxy Servers topic for more information.
Use Poll Timer
When licensing customers, you would always use the poll timer, but for testing purposes, you can turn it off to see the session get closed after it fails to poll.
Use License
If you just need to enforce whether your application is allowed to run or not, having the user open a session is all that is needed. If you also want to enforce additional entitlements or utilize custom license parameters, you can use a volume license file as well. This file can be retrieved through your application by enabling the Use License checkbox, or you can download the same volume license file from the Customer License Portal and copy it into this application's directory.
-
Enable the Use License checkbox and open a new session (click Close Session first if necessary).
-
When the new session is open, check the File menu to see that Feature 1 is now enabled (which is based on this particular License ID).
The reason that a license file is not always included when opening or polling a session is for efficiency, as there would be significant overhead in always including that encrypted data.
You only need to get the license file once, which is then used in combination with the session validation to enforce usage of your application.
To update the volume license file, use the menu File / Refresh License.
Always Save Certificate File
A certificate file is saved if a session is being checked out for offline use, but it can also be saved by enabling the Always Save Certificate File option, which sets the AlwaysSaveCertificate property. This can allow the application to close a previously abandoned session that was due to application crash. Since the session/certificate file is saved, you can reload it and close that session, or you could continue using the session if it still open.
For this sample, each instance will always use a separate seat/session, as demonstrated in the next step.
