This tutorial will demonstrate how to protect your application using the Protection PLUS 5 SDK and LabVIEW 2009 or later. The Protection PLUS 5 SDK has many API functions designed to help you implement basic and advanced licensing features. Review the Understanding Licensing Topic and the Common Implementation Steps for a general understanding of how to implement licensing techniques.
For simplicity, we will be using the LicensingSample project to help get you started. You are free to use or customize the License class in the LicensingSample in your LabVIEW project. We encourage you to create a new class to call API functions that satisfy your licensing needs. See the Defining Licensing Requirements topic.
Next, create a new Product using the instructions in the SOLO Server Product Configuration topic. Go to the menu Configure / Products then use the Actions dropdown and choose Add. When you are finished configuring your product, scroll to the bottom and click Submit.
Your new product will now appear in the Product List. Click Show Options next to your product to expand the Option Details. Click Add New Option to configure your application's activation settings. Give your product option a name, such as "Full License". For this tutorial, we will create a license that fully activates the LicensingSample, it will not be necessary to change any additional settings. Scroll down to the bottom and click Submit.
If you choose to specify a Minimum Activation Version for your product, this number cannot be greater than the version we will later specify in the application. The Minimum Activation Version field represents the minimum version number of your application that your customer must have installed to permit activation. Leave this blank to allow activation for any and all versions of your software. The format of the version number is NNNNN.NNNNN.NNNNN.NNNNN, where N represents a non-negative integer ranging from 0 to 99999, inclusive. No leading zeroes are required. Please note that all four version elements must be specified. For version numbering schemes using less than four version elements, use trailing zeroes (e.g., for version 3.0, specify 3.0.0.0).
We are now ready to start integrating this information into your LabVIEW application.
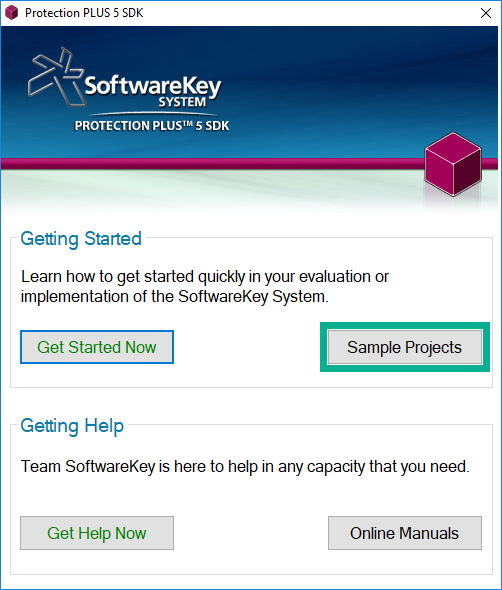
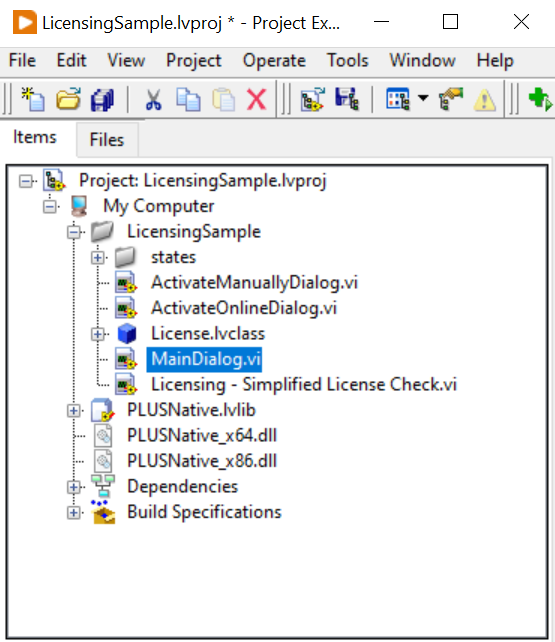
Open the "LicensingSample.lvproj" project found in the Samples directory. The Samples directory can be opened by running Protection PLUS 5 SDK from your start menu/screen, and clicking on the Protection PLUS 5 SDK Samples link.
Once the Licensing Sample has loaded in the LabVIEW Development Environment, expand the Licensing Sample Folder.
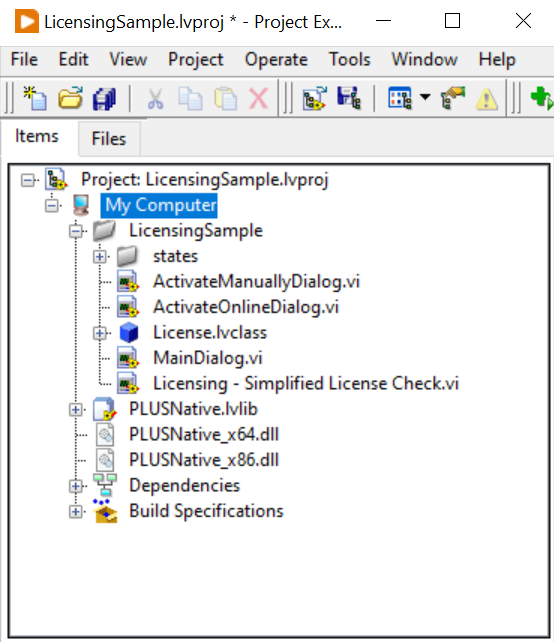
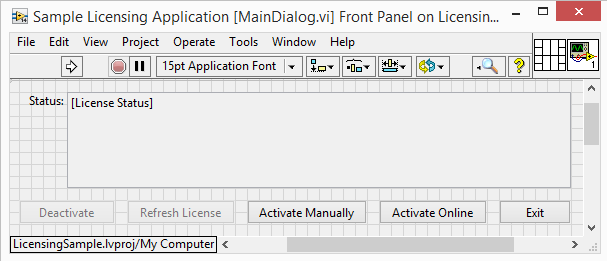
Double-click MainDialog.vi to bring up its front panel.
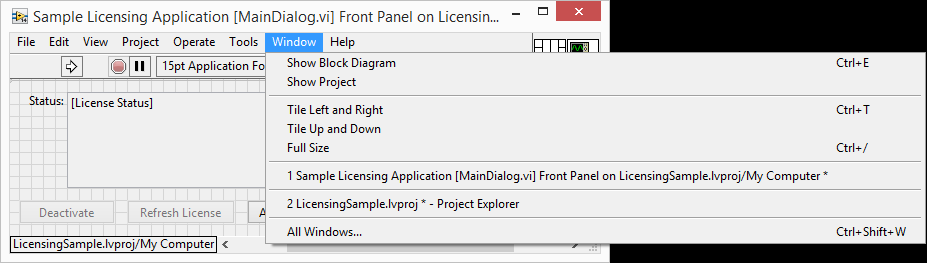
Next, from the menu strip, select Window and click Show Block Diagram.
Once the Block Diagram has loaded, we will need to make some modifications to the source code in order to ensure that the application matches the product options we specified on SOLO Server.
The case structure on the center of the diagram has a drop down selection. Click the drop down arrow to the right and select "Initialize License". We will edit several necessary fields to properly enforce licensing.

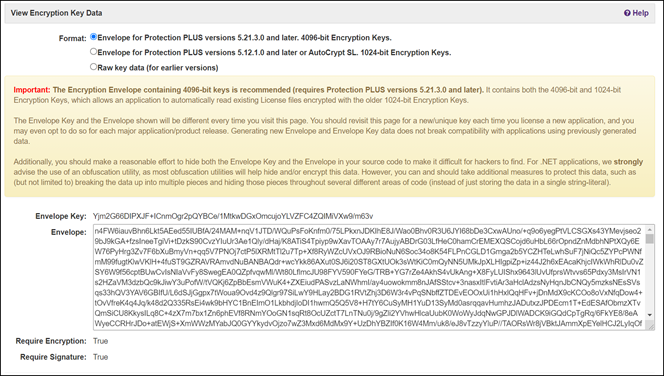
The large text box contains the Envelope we will need to replace using the Envelope we generated on SOLO Server in step #___. You will also need to replace the data in the text box below with the Envelope Key from SOLO Server. The textbox containing "212488" is the Product ID. Replace this number with the Product ID of the product we created on SOLO Server. The text box below is the application's version number. This number will need to be greater than or equal to the Minimum Activation Version in the Product Options on SOLO Server, if you specified a value. If you left this field blank in SOLO Server, any version of your application can be activated with that the Product ID option you configured. You will still want to specify your application's version number in the block diagram.

Save your changes to the MainDialog VI. Close the Block Diagram and return to your Project Files view.
To test the application, right click MainDialog.vi and select Run. Right-click MainDialog.vi, and choose Run.
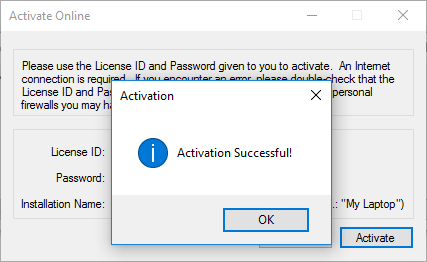
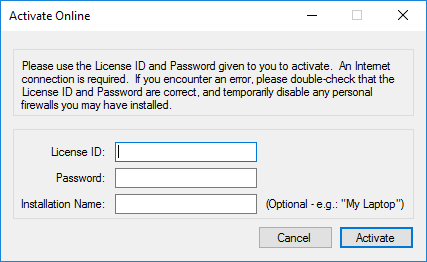
To activate the Sample Licensing Application automatically using SOLO Server, click on Activate Online. A new dialog will prompt for a License ID and Password (both are required). Specifying an installation name is optional, but helpful when performing multiple installations for different machines and/or users.
Return to SOLO Server to create a test license for the Product ID we created earlier.
To add a test license, go to the menu Customers / Add Test License.
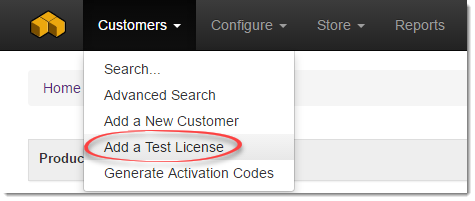
Find your product in this list and click Add New Test License.
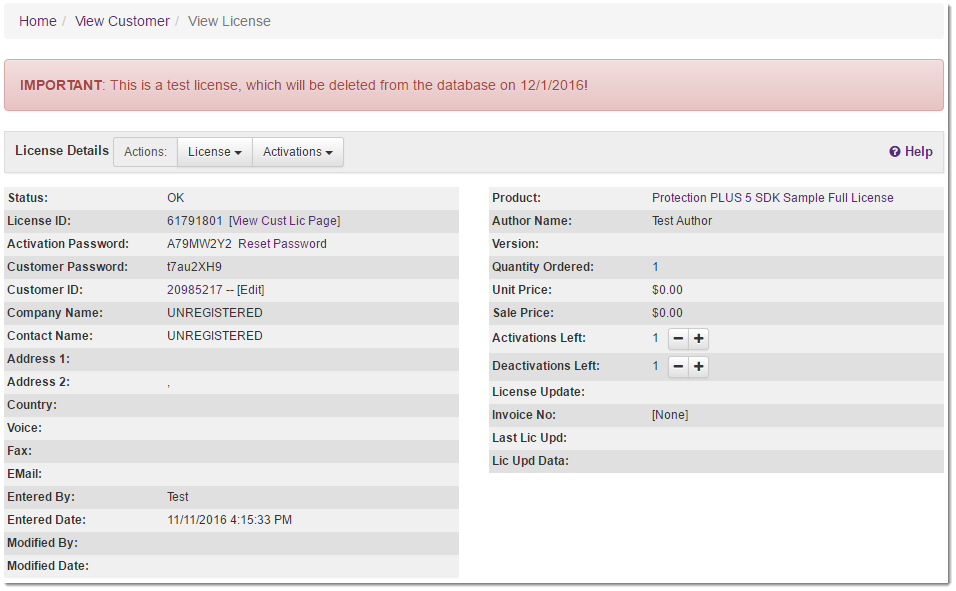
On the Add Test License page, you can make any changes to the default values if needed, and then click Add License.
Test Licenses are meant for software development integration and testing purposes ONLY and should never be sent to a real customer. Test Licenses are DELETED from the license database on the first day of every month.
The test license has now been created and attached to a new, unregistered customer record.
Click on the License ID in the Licenses & Other Items section to load the License Details page.
We now have a License ID and Password to continue testing the Licensing Sample.
Return to the activation prompt for our Licensing Sample.
Enter the License ID and Password in their respective fields and, optionally, an Installation Name.
Click Activate to communicate with SOLO Server for license validation.
Upon successful activation, a confirmation dialog is shown. If the activation fails, please verify the information entered with the license details on SOLO Server.