This section will demonstrate how to create a license in SOLO Server, perform an online activation, remotely modify the license and have it refresh on the client machine, and deactivate a license. While additional functionality is available in the source code, this sample is currently configured to demonstrate these main features.
Open the Sample Scene
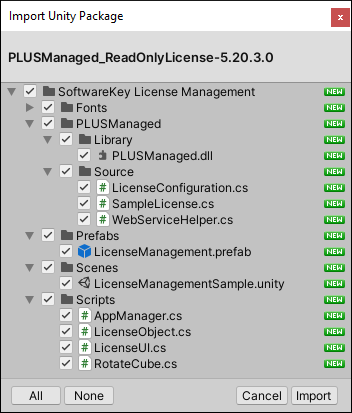
In the Unity Project window, open the LicenseManagementSample scene under the Assets / SoftwareKey License Management / Scenes folder.
You can ignore any “field is assigned but its value is never used” warning messages from the LicenseConfiguration class.
Run the Sample Scene
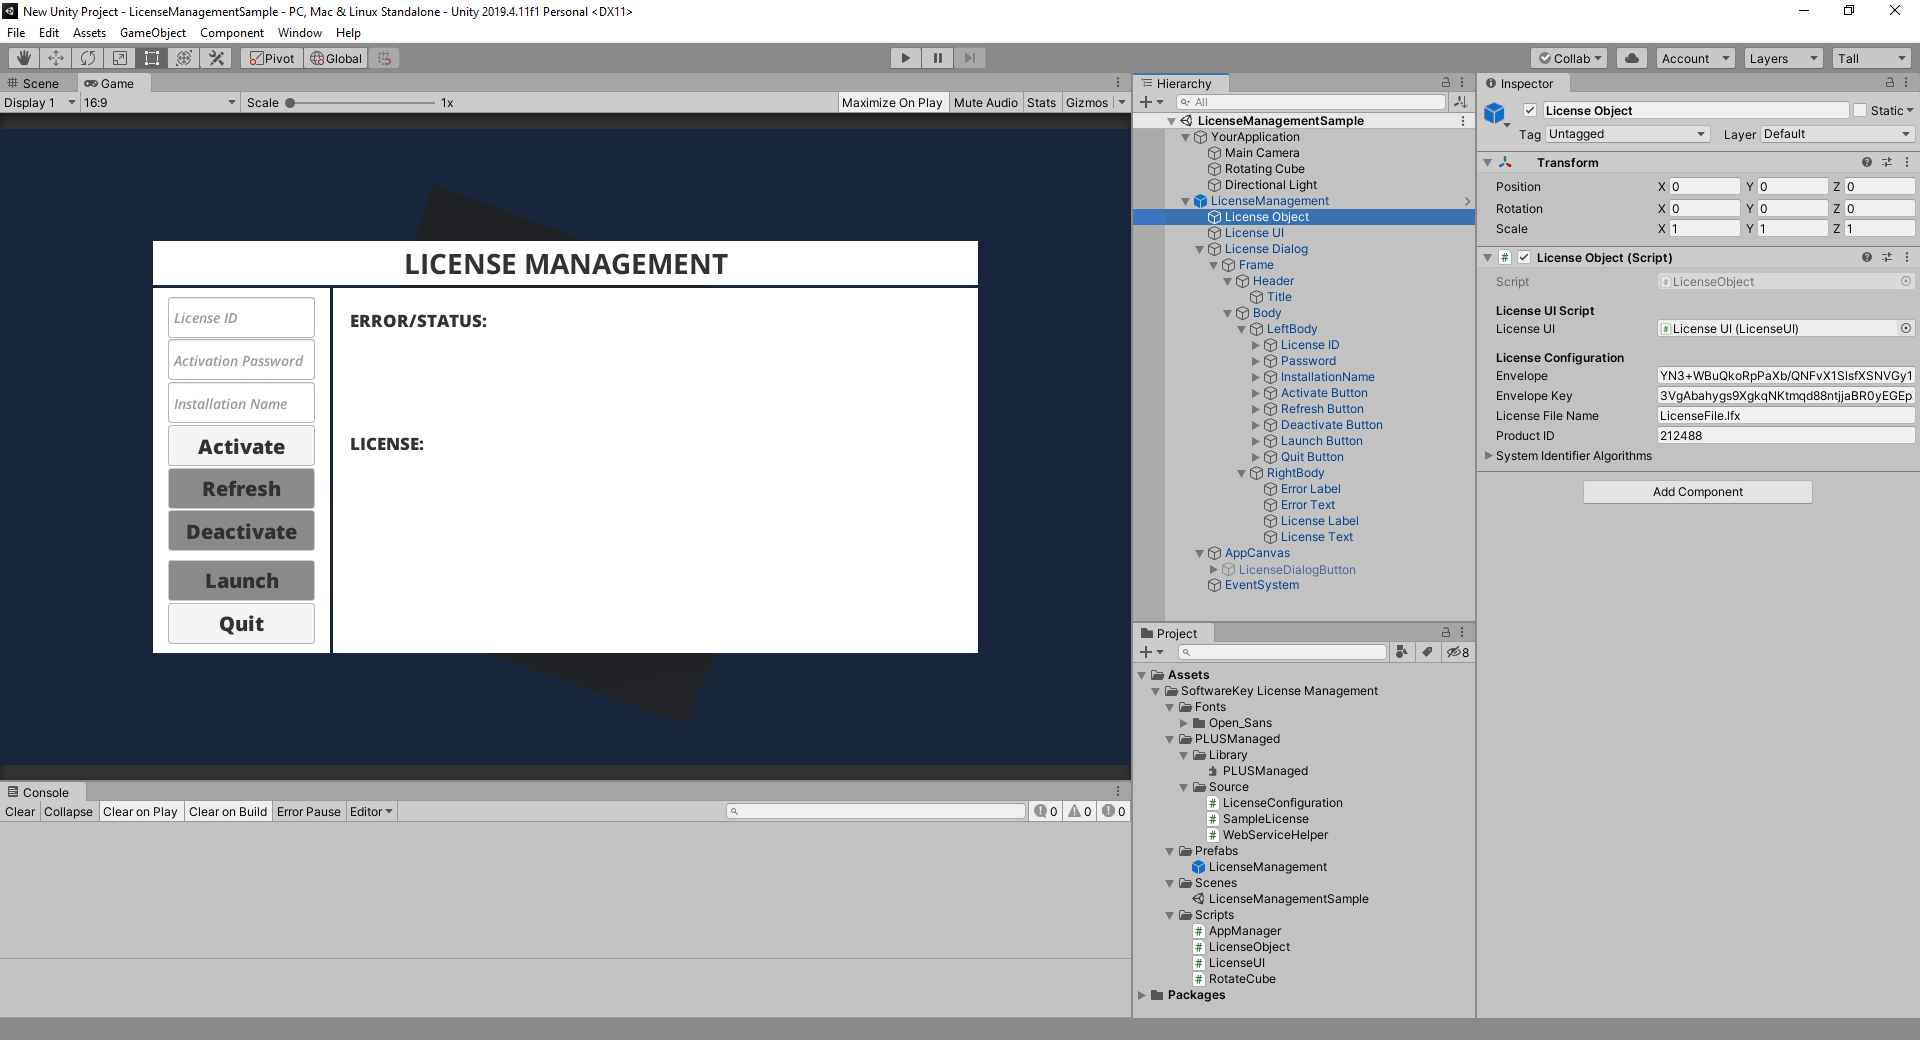
Press the play button to run the application. In the Game window, the License Management user interface will be prompted, and should display:
- Error/Status: 9200 License not found – activation is required.
- License: Unlicensed.
This sample is configured to use a read-only license, which must be acquired through an activation process. The user must activate and have a valid license, and then they will be allowed to access the rest of the application.
Activating online with SOLO Server
The easiest way to activate is to use our central license server, SOLO Server Automation. This sample currently only demonstrates the online activation method.
For ease of use, all of the Protection PLUS 5 SDK sample applications are configured to use a generic Test Author account with its own Encryption Key data. We will use this Test Author account to generate a License ID and Activation Password for this sample.
More details will be provided later in this tutorial for updating the License Object in the Unity Inspector so you can use licenses generated from your own SOLO Server account.
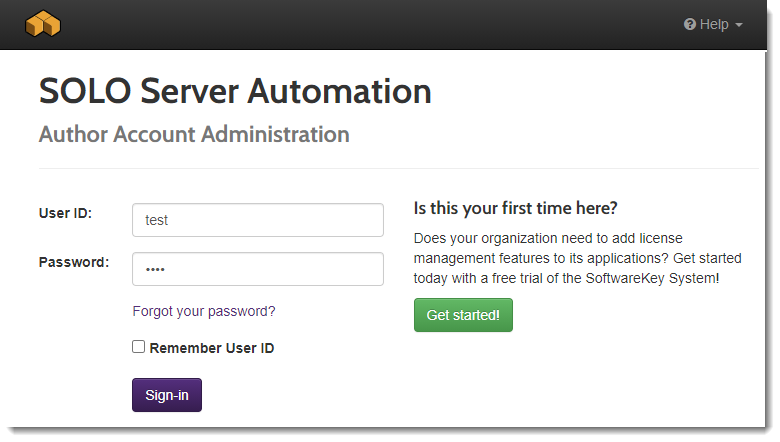
To log into SOLO Server, use the Test Author credentials:
- User ID: test
- Password: test
Creating the License
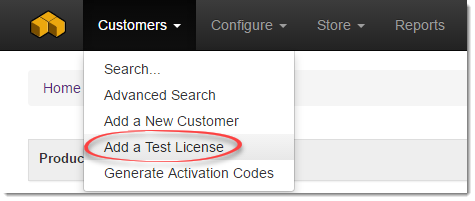
To add a test license, go to the menu Customers / Add Test License.
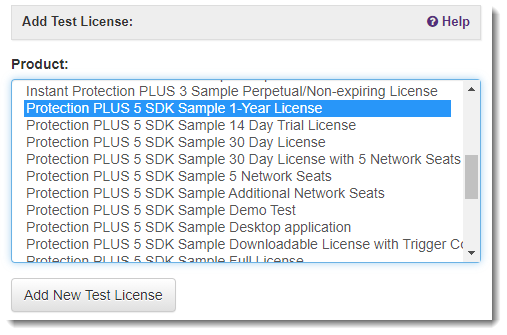
Select the Protection PLUS 5 SDK Sample 1-Year License and click Add New Test License. Other "Protection PLUS 5 SDK" time-limited licenses are also supported, and the "Sample Full License" is a perpetual license.
On the Add Test License page, do not change the default values and click Add License.
Test Licenses are meant for software development integration and testing purposes ONLY and should never be sent to a real customer. Test Licenses are DELETED from the license database on the first day of every month.
The test license has now been created based on the Protection PLUS 5 SDK Sample Full License Product Option settings and attached to a new, unregistered customer record.
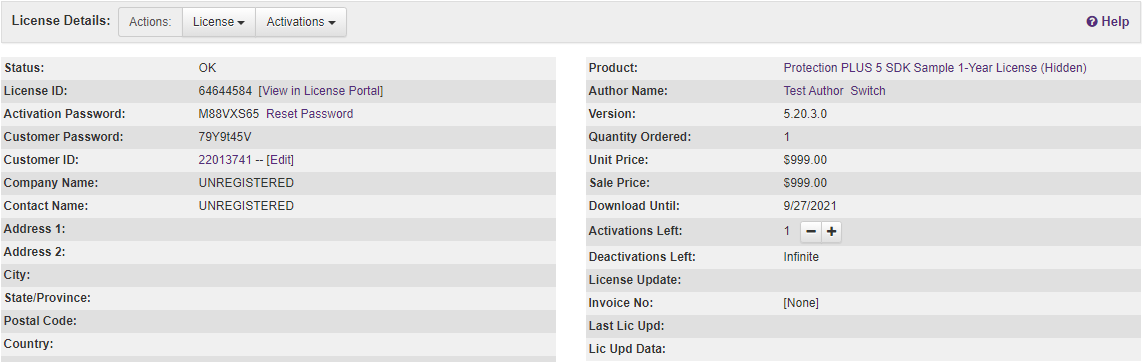
Click on the License ID in the Licenses & Other Items section to load the License Details page.
Activating with the License
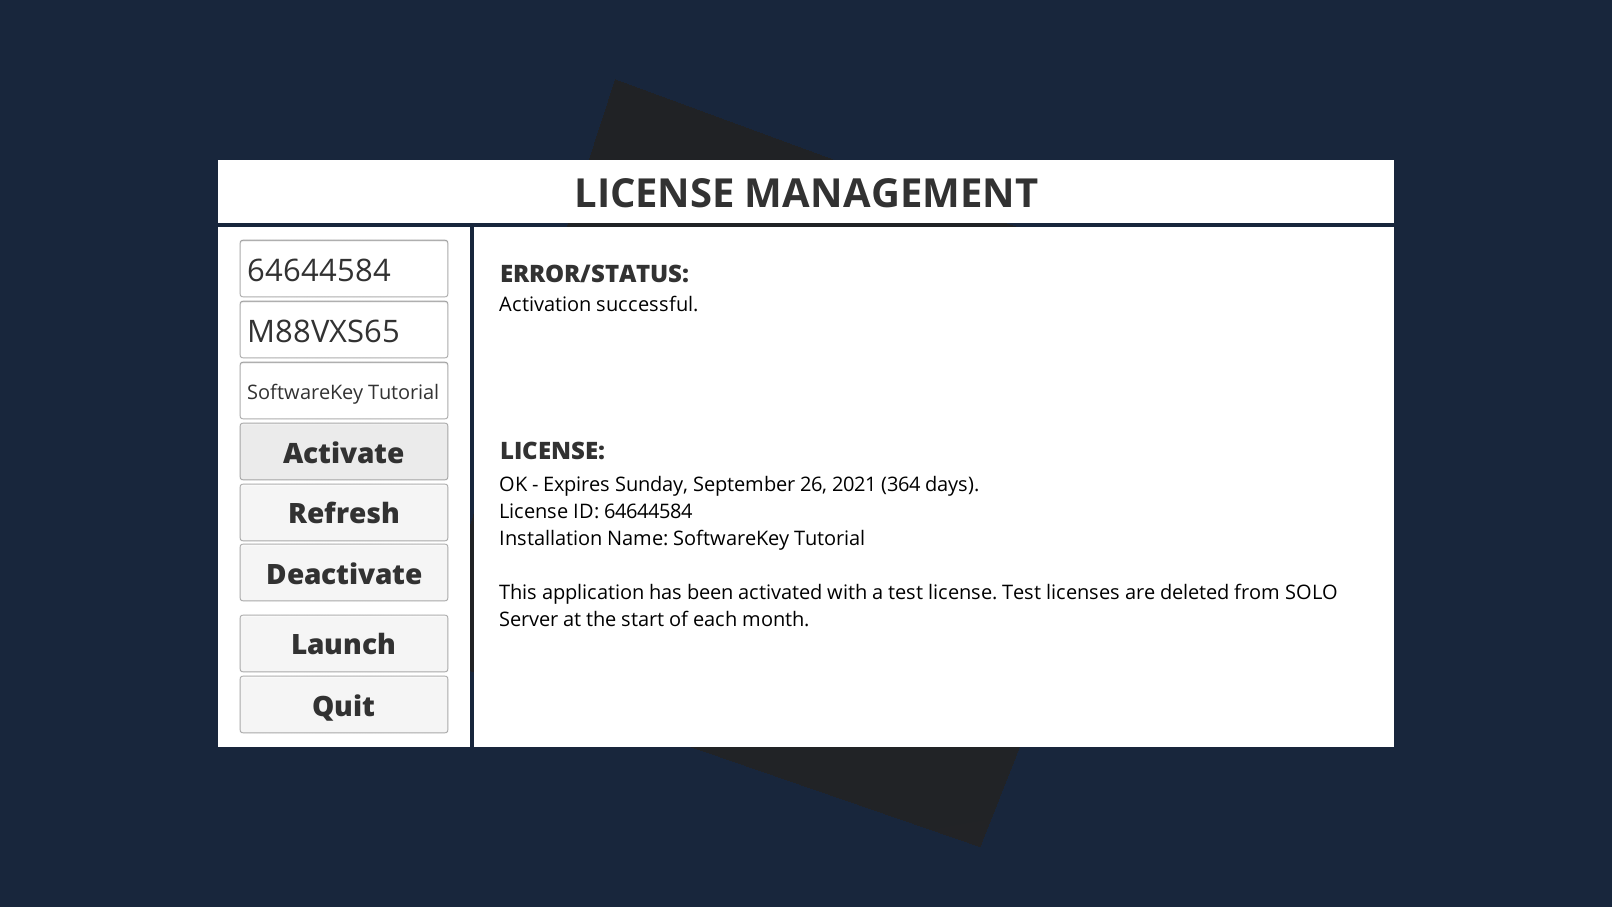
Return to the activation prompt in the Unity sample.
Enter the License ID and Activation Password in their respective fields and, optionally, an Installation Name. The Installation Name will be listed in the SOLO Serveractivation history and can be useful for identifying a particular installation.
The Error/Status text field will show whether the activation was successful or what the error was.
If successful, the License text field will be updated with details about the license. With a valid license, the Refresh, Deactivation, and Launch buttons will be interactable.
Pressing the Launch button will run the rest of the application. For this sample, it is simply pausing the scene by setting Time.timeScale = 0f at startup. After pressing Launch, the scene is unpaused (Time.timeScale = 1f) and the License Management object is set to inactive.
The only functionality in this sample scene is a rotating cube and a button to set the License Management dialog as active again. Depending on your application, you can implement other approaches that do not allow the user to access the main functionality of your application until it has a valid license.
Refreshing a license
A license Refresh will get a new/updated license from SOLO Server, which can include an updated expiration date or any other license parameters. It will also validate that the license is still valid, and will enforce a remote deactivation if applicable.
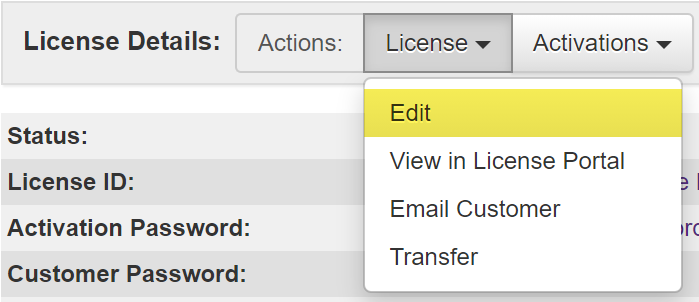
In SOLO Server, use the drop-down License / Edit, and update the Download Until date (which is used as the license expiration date in this case).
After updating the date, press the Submit button at the bottom of the page.
In the Unity application, press the Refresh button to get an updated license file with the updated expiration date. You should see that the Refresh was successful, and the new expiration date will be reflected in the License text field.
The Protection PLUS 5 SDK Sample 1-Year License Product Option is configured with License Validation Options, and will always require validation with SOLO Server. This is helpful for testing purposes, but we generally recommend using more lenient validation periods, as requiring validation with the license server every time could restrict legitimate users from accessing your software if they don’t have a stable internet connection. Note that your software will still be validating against the local license file each time you perform a license check.
Deactivating a license
You can allow the user to deactivate their installation directly through the application, which will delete the local license file, disable the Launch button, and set that particular installation to a deactivated status in SOLO Server. It will also increment the Activations Left count on the License ID in SOLO Server, allowing the user to activate on another computer.
See this topic for more general information and recommendations on deactivations.